前言
通过 自建vue组件 air-ui (5) -- 创建第一个组件 Button 和 自建vue组件 air-ui (6) -- 创建内置服务组件 我们知道怎么创建标签组件和内置服务组件了,这一节我们来讲讲怎么创建指令组件。
这次我们做 loading 组件,还是拿 element ui 的 loading 来参考, 它这个组件有点意思,有两种调用方式:
- 全局指令方式
- 全局方法的服务方式
这个其实就告诉我们,只要你想,一个组件可以有不同的表现方式,不管是标签方式,还是指令,或者服务方式。 我们先看下目录结构:1
2
3
4
5
6
7components/
| |--- loading/
| | |--- src/
| | | |--- directive.js
| | | |--- index.js
| | | |--- loading.vue
| | |--- index.js
从目录结构来看,应该很好理解。 .vue 结尾的是 dom 渲染, directive.js 是指令封装逻辑, index.js 是服务的封装逻辑。 根目录下的 index.js 是导出的方式
loading 的服务方式
温故而知新,我们已经在上节知道了怎么创建服务类型的组件,但是本节再温习一下也没有坏处。首先我们看 loading.vue 这个 vue 组件的代码:1
2
3
4
5
6
7
8
9
10
11
12
13
14
15
16
17
18
19
20
21
22
23
24
25
26
27
28
29
30
31
32
33
34
35
36
37
38
39
40
41<template>
<transition name="air-loading-fade" @after-leave="handleAfterLeave">
<div
v-show="visible"
class="air-loading-mask"
:style="{ backgroundColor: background || '' }"
:class="[customClass, { 'is-fullscreen': fullscreen }]">
<div class="air-loading-spinner">
<svg v-if="!spinner" class="circular" viewBox="25 25 50 50">
<circle class="path" cx="50" cy="50" r="20" fill="none"/>
</svg>
<i v-else :class="spinner"></i>
<p v-if="text" class="air-loading-text">{{ text }}</p>
</div>
</div>
</transition>
</template>
<script>
export default {
data() {
return {
text: null,
spinner: null,
background: null,
fullscreen: true,
visible: false,
customClass: ''
};
},
methods: {
handleAfterLeave() {
this.$emit('after-leave');
},
setText(text) {
this.text = text;
}
}
};
</script>
逻辑很简单,就是一个 div,然后里面根据参数设置不同的样式和类, 我这边不细说,接下来看 src/index.js:1
2
3
4
5
6
7
8
9
10
11
12
13
14
15
16
17
18
19
20
21
22
23
24
25
26
27
28
29
30
31
32
33
34
35
36
37
38
39
40
41
42
43
44
45
46
47
48
49
50
51
52
53
54
55
56
57
58
59
60
61
62
63
64
65
66
67
68
69
70
71
72
73
74
75
76
77
78
79
80
81
82
83
84
85
86
87
88
89
90
91
92
93
94
95
96
97
98
99
100
101
102
103
104
105
106import Vue from 'vue';
import loadingVue from './loading.vue';
import { addClass, removeClass, getStyle } from '../../../../src/utils/dom';
import { PopupManager } from '../../../../src/utils/popup';
import afterLeave from '../../../../src/utils/after-leave';
import merge from '../../../../src/utils/merge';
const LoadingConstructor = Vue.extend(loadingVue);
const defaults = {
text: null,
fullscreen: true,
body: false,
lock: false,
customClass: ''
};
let fullscreenLoading;
LoadingConstructor.prototype.originalPosition = '';
LoadingConstructor.prototype.originalOverflow = '';
LoadingConstructor.prototype.close = function() {
if (this.fullscreen) {
fullscreenLoading = undefined;
}
afterLeave(this, _ => {
const target = this.fullscreen || this.body
? document.body
: this.target;
removeClass(target, 'air-loading-parent--relative');
removeClass(target, 'air-loading-parent--hidden');
if (this.$el && this.$el.parentNode) {
this.$el.parentNode.removeChild(this.$el);
}
this.$destroy();
}, 300);
this.visible = false;
};
const addStyle = (options, parent, instance) => {
let maskStyle = {};
if (options.fullscreen) {
instance.originalPosition = getStyle(document.body, 'position');
instance.originalOverflow = getStyle(document.body, 'overflow');
maskStyle.zIndex = PopupManager.nextZIndex();
} else if (options.body) {
instance.originalPosition = getStyle(document.body, 'position');
['top', 'left'].forEach(property => {
let scroll = property === 'top' ? 'scrollTop' : 'scrollLeft';
maskStyle[property] = options.target.getBoundingClientRect()[property] +
document.body[scroll] +
document.documentElement[scroll] +
'px';
});
['height', 'width'].forEach(property => {
maskStyle[property] = options.target.getBoundingClientRect()[property] + 'px';
});
} else {
instance.originalPosition = getStyle(parent, 'position');
}
Object.keys(maskStyle).forEach(property => {
instance.$el.style[property] = maskStyle[property];
});
};
const Loading = (options = {}) => {
if (Vue.prototype.$isServer) return;
options = merge({}, defaults, options);
if (typeof options.target === 'string') {
options.target = document.querySelector(options.target);
}
options.target = options.target || document.body;
if (options.target !== document.body) {
options.fullscreen = false;
} else {
options.body = true;
}
if (options.fullscreen && fullscreenLoading) {
return fullscreenLoading;
}
let parent = options.body ? document.body : options.target;
let instance = new LoadingConstructor({
el: document.createElement('div'),
data: options
});
addStyle(options, parent, instance);
if (instance.originalPosition !== 'absolute' && instance.originalPosition !== 'fixed') {
addClass(parent, 'air-loading-parent--relative');
}
if (options.fullscreen && options.lock) {
addClass(parent, 'air-loading-parent--hidden');
}
parent.appendChild(instance.$el);
Vue.nextTick(() => {
instance.visible = true;
});
if (options.fullscreen) {
fullscreenLoading = instance;
}
return instance;
};
export default Loading;
逻辑跟上节的 notification 一样,也是先用Vue.extend(loadingVue)生成一个构建函数,然后在 Loading 函数对象中,通过工厂方式去实例化这个对象,最后再添加到 body 或者 target 元素中,最后返回这个实例化的对象,当然中间有许多样式的处理,包括当前是否要全屏之类的。
这种服务的挂载是:1
2import service from './components/loading/src/index';
Vue.prototype.$loading = service;
调用也是一样的:1
2
3
4
5
6
7
8
9const loading = this.$loading({
lock: true,
text: 'Loading',
spinner: 'air-icon-loading',
background: 'rgba(0, 0, 0, 0.7)'
});
setTimeout(() => {
loading.close();
}, 2000);
指令方式
接下来我们看下指令方式的逻辑: src/directive.js:1
2
3
4
5
6
7
8
9
10
11
12
13
14
15
16
17
18
19
20
21
22
23
24
25
26
27
28
29
30
31
32
33
34
35
36
37
38
39
40
41
42
43
44
45
46
47
48
49
50
51
52
53
54
55
56
57
58
59
60
61
62
63
64
65
66
67
68
69
70
71
72
73
74
75
76
77
78
79
80
81
82
83
84
85
86
87
88
89
90
91
92
93
94
95
96
97
98
99
100
101
102
103
104
105
106
107
108
109
110
111
112
113
114
115
116
117
118
119
120
121
122
123
124
125
126
127
128
129
130
131
132
133import Vue from 'vue';
import Loading from './loading.vue';
import { addClass, removeClass, getStyle } from '../../../../src/utils/dom';
import { PopupManager } from '../../../../src/utils/popup';
import afterLeave from '../../../../src/utils/after-leave';
const Mask = Vue.extend(Loading);
const loadingDirective = {};
loadingDirective.install = Vue => {
if (Vue.prototype.$isServer) return;
const toggleLoading = (el, binding) => {
if (binding.value) {
Vue.nextTick(() => {
if (binding.modifiers.fullscreen) {
el.originalPosition = getStyle(document.body, 'position');
el.originalOverflow = getStyle(document.body, 'overflow');
el.maskStyle.zIndex = PopupManager.nextZIndex();
addClass(el.mask, 'is-fullscreen');
insertDom(document.body, el, binding);
} else {
removeClass(el.mask, 'is-fullscreen');
if (binding.modifiers.body) {
el.originalPosition = getStyle(document.body, 'position');
['top', 'left'].forEach(property => {
const scroll = property === 'top' ? 'scrollTop' : 'scrollLeft';
el.maskStyle[property] = el.getBoundingClientRect()[property] +
document.body[scroll] +
document.documentElement[scroll] -
parseInt(getStyle(document.body, `margin-${ property }`), 10) +
'px';
});
['height', 'width'].forEach(property => {
el.maskStyle[property] = el.getBoundingClientRect()[property] + 'px';
});
insertDom(document.body, el, binding);
} else {
el.originalPosition = getStyle(el, 'position');
insertDom(el, el, binding);
}
}
});
} else {
afterLeave(el.instance, _ => {
if (!el.instance.hiding) return;
el.domVisible = false;
const target = binding.modifiers.fullscreen || binding.modifiers.body
? document.body
: el;
removeClass(target, 'air-loading-parent--relative');
removeClass(target, 'air-loading-parent--hidden');
el.instance.hiding = false;
}, 300, true);
el.instance.visible = false;
el.instance.hiding = true;
}
};
const insertDom = (parent, el, binding) => {
if (!el.domVisible && getStyle(el, 'display') !== 'none' && getStyle(el, 'visibility') !== 'hidden') {
Object.keys(el.maskStyle).forEach(property => {
el.mask.style[property] = el.maskStyle[property];
});
if (el.originalPosition !== 'absolute' && el.originalPosition !== 'fixed') {
addClass(parent, 'air-loading-parent--relative');
}
if (binding.modifiers.fullscreen && binding.modifiers.lock) {
addClass(parent, 'air-loading-parent--hidden');
}
el.domVisible = true;
parent.appendChild(el.mask);
Vue.nextTick(() => {
if (el.instance.hiding) {
el.instance.$emit('after-leave');
} else {
el.instance.visible = true;
}
});
el.domInserted = true;
} else if (el.domVisible && el.instance.hiding === true) {
el.instance.visible = true;
el.instance.hiding = false;
}
};
Vue.directive('loading', {
bind: function(el, binding, vnode) {
const textExr = el.getAttribute('element-loading-text');
const spinnerExr = el.getAttribute('element-loading-spinner');
const backgroundExr = el.getAttribute('element-loading-background');
const customClassExr = el.getAttribute('element-loading-custom-class');
const vm = vnode.context;
const mask = new Mask({
el: document.createElement('div'),
data: {
text: (vm && vm[textExr]) || textExr,
spinner: (vm && vm[spinnerExr]) || spinnerExr,
background: (vm && vm[backgroundExr]) || backgroundExr,
customClass: (vm && vm[customClassExr]) || customClassExr,
fullscreen: !!binding.modifiers.fullscreen
}
});
el.instance = mask;
el.mask = mask.$el;
el.maskStyle = {};
binding.value && toggleLoading(el, binding);
},
update: function(el, binding) {
el.instance.setText(el.getAttribute('element-loading-text'));
if (binding.oldValue !== binding.value) {
toggleLoading(el, binding);
}
},
unbind: function(el, binding) {
if (el.domInserted) {
el.mask &&
el.mask.parentNode &&
el.mask.parentNode.removeChild(el.mask);
toggleLoading(el, { value: false, modifiers: binding.modifiers });
}
el.instance && el.instance.$destroy();
}
});
};
export default loadingDirective;
这时候要说一下 vue 是怎么创建指令的,具体可以看文档自定义指令, 文档写的非常清楚了,我这边不打算详细讲太多,稍微提一下, vue 的自定义指令有两种方式:
注册全局组件,比如:
1
2
3
4
5
6
7
8// 注册一个全局自定义指令 `v-focus`
Vue.directive('focus', {
// 当被绑定的元素插入到 DOM 中时……
inserted: function (el) {
// 聚焦元素
el.focus()
}
})在组件中注册局部组件,组件中也接受一个
directives的选项:1
2
3
4
5
6
7
8directives: {
focus: {
// 指令的定义
inserted: function (el) {
el.focus()
}
}
}
事实上,本节讲的 loading, 就是全局注册的指令,其实 element-ui 也有局部组件的,在 src/directives目录中,就存放了一些局部自定义指令: mousewheel 和 repeat-click, 某些组件,比如 table 组件就会用到这些自定义的局部指令。
而且有以下几个钩子函数可以提供(这些都是可选的):
- bind:只调用一次,指令第一次绑定到元素时调用。在这里可以进行一次性的初始化设置。
- inserted:被绑定元素插入父节点时调用 (仅保证父节点存在,但不一定已被插入文档中)。
- update:所在组件的 VNode 更新时调用,但是可能发生在其子 VNode 更新之前。指令的值可能发生了改变,也可能没有。但是你可以通过比较更新前后的值来忽略不必要的模板更新 (详细的钩子函数参数见下)。
- componentUpdated:指令所在组件的 VNode 及其子 VNode 全部更新后调用。
- unbind:只调用一次,指令与元素解绑时调用。
接下来我们回到上面的代码中,分析一下:
- 首先返回了
loadingDirective这个对象,而这个对象只有一个install方法,这就说明了这个指令的初始化方式肯定是用Vue.use的方式引用的。 - 在
install方法中,才出现了注册全局指令的定义Vue.directive('loading', {..},接下来我们简单分析一下这几个钩子函数:bind是第一次绑定到元素的时候,el参数表示指令所绑定的元素,可以用来直接操作 DOM。 逻辑就是获取el的一些参数属性,然后渲染出 loading dom 模板,然后再根据是否要全屏显示的参数,来判断是插入到el中,还是 body 中。update方法,其实就是在 loading 的过程中,我们允许对文案进行更新,最常见的就是加载进度条后面的百分比进度,就是一直在更新unbind就是移除绑定的操作
调用的方式,就是类似于这样子:1
2import directive from './components/loading/src/directive';
Vue.use(directive);
入口文件
既然 loading 有全局指令的方式和内置服务(全局方法)的方式,而且初始化的方式不一样,所以就统一为用 use 来调用, src/components/loading/index.js1
2
3
4
5
6
7
8
9
10
11import directive from './src/directive';
import service from './src/index';
export default {
install(Vue) {
Vue.use(directive);
Vue.prototype.$loading = service;
},
directive,
service
};
导出的时候,有包含 install 方法,然后在 install 方法里面,针对两种方式进行初始化,所以在 main.js 的调用,就是:1
2
3import Loading from './components/loading'
Vue.use(Loading)
这样就可以了,两种方式都可以被初始化。当然最好的方式还是写在 src/components/index.js 里面:1
2
3
4
5
6
7
8
9
10
11
12
13
14
15...
import Loading from './loading'
...
const install = function (Vue) {
...
// Vue.use(Loading);
// 可以像上面那样用 use 直接两种都初始化,也可以像下面这一种,分开初始化
Vue.use(Loading.directive);
Vue.prototype.$loading = Loading.service;
...
}
export default {
install
}
测试
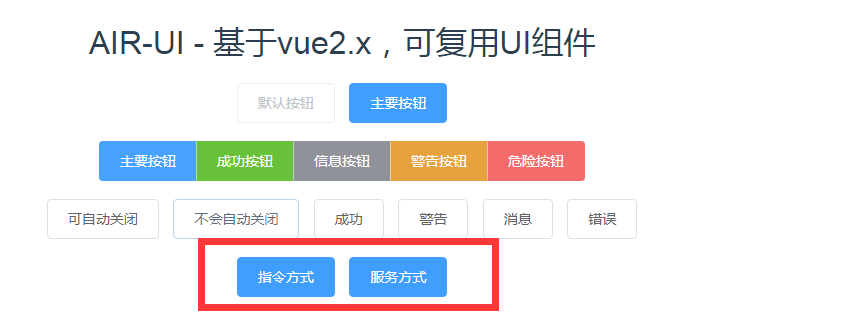
接下来我们在 home.vue 进行测试, 在 template 加上这个:1
2
3
4
5
6
7
8
9
10
11<air-button
type="primary"
@click="openFullScreen1"
v-loading.fullscreen.lock="fullscreenLoading">
指令方式
</air-button>
<air-button
type="primary"
@click="openFullScreen2">
服务方式
</air-button>
表示两种方式的调用方式, 然后在 script 里面加上对应的参数和方法:1
2
3
4
5
6
7
8
9
10
11
12
13
14
15
16
17
18
19
20
21
22
23
24
25
26
27
28
29
30<script>
export default {
data () {
return {
...
fullscreenLoading: false
}
},
methods: {
...
openFullScreen1() {
this.fullscreenLoading = true;
setTimeout(() => {
this.fullscreenLoading = false;
}, 2000);
},
openFullScreen2() {
const loading = this.$loading({
  lock: true,
  text: 'Loading',
  spinner: 'air-icon-loading',
  background: 'rgba(0, 0, 0, 0.7)'
});
setTimeout(() => {
  loading.close();
}, 2000);
}
}
}
</script>
这样就可以看到效果了:
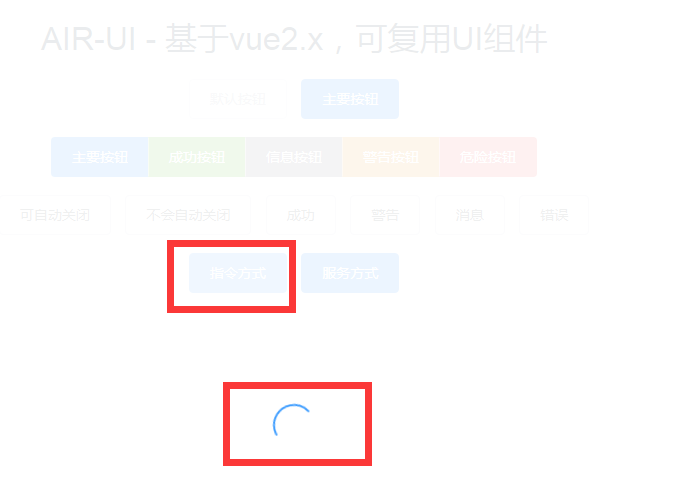
接下来点击指令方式,可以看到效果
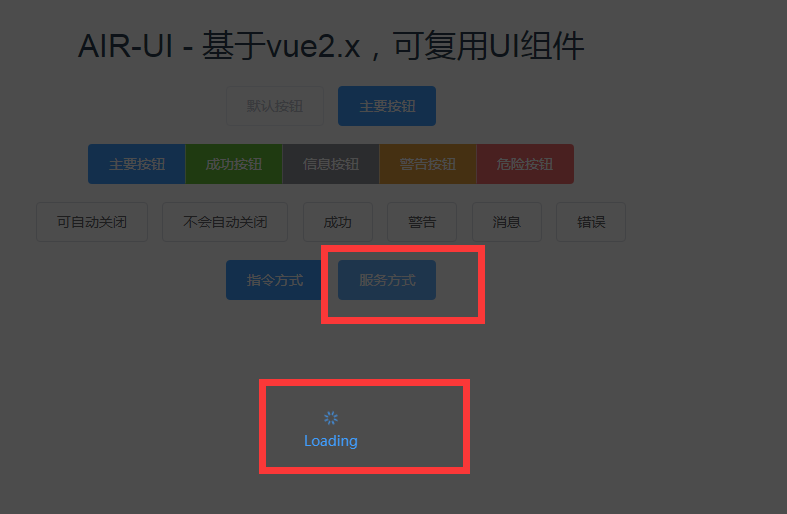
点击服务方式,也可以看到效果,同时服务方式的定制化更高
总结
这样子指令类型的组件的创建就完成了。 下节我们讲一下,怎么部分引入组件
系列文章:
自建vue组件 air-ui (1) -- 为啥我要自建一个类 element ui 的组件
自建vue组件 air-ui (2) -- 先分析一下 element ui 项目
自建vue组件 air-ui (3) -- css 开发规范
自建vue组件 air-ui (4) -- air-ui 环境搭建和目录结构
自建vue组件 air-ui (5) -- 创建第一个组件 Button
自建vue组件 air-ui (6) -- 创建内置服务组件
自建vue组件 air-ui (7) -- 创建指令组件
自建vue组件 air-ui (8) -- 实现部分引入组件
自建vue组件 air-ui (9) -- 用 vuepress 写文档
自建vue组件 air-ui (10) -- vuepress 写文档 (进阶版)
自建vue组件 air-ui (11) -- vuepress 写文档 (爬坑版)
自建vue组件 air-ui (12) -- 国际化机制
自建vue组件 air-ui (13) -- 国际化机制(进阶版)
自建vue组件 air-ui (14) -- 打包构建(dev 和 dist)
自建vue组件 air-ui (15) -- 主题定制
自建vue组件 air-ui (16) -- 打包构建 pub 任务
自建vue组件 air-ui (17) -- 开发爬坑篇以及总结