前言
通过 自建vue组件 air-ui (5) -- 创建第一个组件 Button 我们已经知道怎么创建一个标签类型的组件了。本节我们就继续讲怎么创建服务类型的组件。
创建服务类型的组件
以 notification 这个组件为例,他就是一个典型的内置服务组件。其实就是绑定到Vue的原型上,当做全局方法来使用。
设置 vue 的全局方法其实很常见,比如发 ajax 请求时喜欢用axios挂载到vue原型上,如下:1
2
3
4
5
6
7
8// 1 引入vue和axios
import Vue from 'vue'
import axios from 'axios'
// 2 对axios的一些封装
// code ...
// 3 然后挂载到原型上
Vue.prototype.$axios = axios
用的时候就直接上 this.$axios1
2// 用axios.get()方法可以这样用
this.$axios.get()
这样确实方便,不用每个用到 axios 的组件都去引入。 这种方法其实很简单,而内置的服务也是差不多的原理,只不过会涉及到一些 dom 的操作, 以 notification 为例,这边可以看效果: element-ui 的 Notification 通知
这边主要分为三个步骤,具体的目录结构如下:1
2
3
4
5
6components/
| |--- notification/
| | |--- src/
| | | |--- main.js
| | | |--- main.vue
| | |--- index.js
创建一个 vue 组件
因为涉及到 dom 操作,所以第一步就是先创建一个 notification 对应的 vue 组件, 就是 notification/src/main.vue:1
2
3
4
5
6
7
8
9
10
11
12
13
14
15
16
17
18
19
20
21
22
23
24
25
26
27
28
29
30
31
32
33
34
35
36
37
38
39
40
41
42
43
44
45
46
47
48
49
50
51
52
53
54
55
56
57
58
59
60
61
62
63
64
65
66
67
68
69
70
71
72
73
74
75
76
77
78
79
80
81
82
83
84
85
86
87
88
89
90
91
92
93
94
95
96
97
98
99
100
101
102
103
104
105
106
107
108
109
110
111
112
113
114
115
116
117
118
119
120
121
122
123
124
125
126
127
128
129
130
131
132
133
134
135
136
137
138
139
140
141
142
143
144
145
146
147
148
149
150
151<template>
<transition name="air-notification-fade">
<div
:class="['air-notification', customClass, horizontalClass]"
v-show="visible"
:style="positionStyle"
@mouseenter="clearTimer()"
@mouseleave="startTimer()"
@click="click"
role="alert"
>
<i
class="air-notification__icon"
:class="[ typeClass, iconClass ]"
v-if="type || iconClass">
</i>
<div class="air-notification__group" :class="{ 'is-with-icon': typeClass || iconClass }">
<h2 class="air-notification__title" v-text="title"></h2>
<div class="air-notification__content" v-show="message">
<slot>
<p v-if="!dangerouslyUseHTMLString">{{ message }}</p>
<p v-else v-html="message"></p>
</slot>
</div>
<div
class="air-notification__closeBtn air-icon-close"
v-if="showClose"
@click.stop="close"></div>
</div>
</div>
</transition>
</template>
<script type="text/babel">
let typeMap = {
success: 'success',
info: 'info',
warning: 'warning',
error: 'error'
};
export default {
data() {
return {
visible: false,
title: '',
message: '',
duration: 4500,
type: '',
showClose: true,
customClass: '',
iconClass: '',
onClose: null,
onClick: null,
closed: false,
verticalOffset: 0,
timer: null,
dangerouslyUseHTMLString: false,
position: 'top-right'
};
},
computed: {
typeClass() {
return this.type && typeMap[this.type] ? `air-icon-${ typeMap[this.type] }` : '';
},
horizontalClass() {
return this.position.indexOf('right') > -1 ? 'right' : 'left';
},
verticalProperty() {
return /^top-/.test(this.position) ? 'top' : 'bottom';
},
positionStyle() {
return {
[this.verticalProperty]: `${ this.verticalOffset }px`
};
}
},
watch: {
closed(newVal) {
if (newVal) {
this.visible = false;
this.$el.addEventListener('transitionend', this.destroyElement);
}
}
},
methods: {
destroyElement() {
this.$el.removeEventListener('transitionend', this.destroyElement);
this.$destroy(true);
this.$el.parentNode.removeChild(this.$el);
},
click() {
if (typeof this.onClick === 'function') {
this.onClick();
}
},
close() {
this.closed = true;
if (typeof this.onClose === 'function') {
this.onClose();
}
},
clearTimer() {
clearTimeout(this.timer);
},
startTimer() {
if (this.duration > 0) {
this.timer = setTimeout(() => {
if (!this.closed) {
this.close();
}
}, this.duration);
}
},
keydown(e) {
if (e.keyCode === 46 || e.keyCode === 8) {
this.clearTimer(); // detele 取消倒计时
} else if (e.keyCode === 27) { // esc关闭消息
if (!this.closed) {
this.close();
}
} else {
this.startTimer(); // 恢复倒计时
}
}
},
mounted() {
if (this.duration > 0) {
this.timer = setTimeout(() => {
if (!this.closed) {
this.close();
}
}, this.duration);
}
document.addEventListener('keydown', this.keydown);
},
beforeDestroy() {
document.removeEventListener('keydown', this.keydown);
}
};
</script>
具体逻辑不细说了,他就是普通的一个 vue 组件,无非就是一个 dom 结构,还有就是各种事件和参数的触发和监听,不难理解,可以理解为 notification 这个组件的 dom 渲染。
构建 notification 的结构体
既然 dom 已经准备好了,接下来只要构建 Notification 的结构体就行了,然后让这个结构体的各种方法去操作 dom 就行了。 所以 notification/src/main.js:1
2
3
4
5
6
7
8
9
10
11
12
13
14
15
16
17
18
19
20
21
22
23
24
25
26
27
28
29
30
31
32
33
34
35
36
37
38
39
40
41
42
43
44
45
46
47
48
49
50
51
52
53
54
55
56
57
58
59
60
61
62
63
64
65
66
67
68
69
70
71
72
73
74
75
76
77
78
79
80
81
82
83
84
85
86
87
88
89
90
91
92
93
94import Vue from 'vue';
import Main from './main.vue';
import merge from '../../../../src/utils/merge';
import { PopupManager } from '../../../../src/utils/popup';
import { isVNode } from '../../../../src/utils/vdom';
const NotificationConstructor = Vue.extend(Main);
let instance;
let instances = [];
let seed = 1;
const Notification = function(options) {
if (Vue.prototype.$isServer) return;
options = merge({}, options);
const userOnClose = options.onClose;
const id = 'notification_' + seed++;
const position = options.position || 'top-right';
options.onClose = function() {
Notification.close(id, userOnClose);
};
instance = new NotificationConstructor({
data: options
});
if (isVNode(options.message)) {
instance.$slots.default = [options.message];
options.message = 'REPLACED_BY_VNODE';
}
instance.id = id;
instance.$mount();
document.body.appendChild(instance.$el);
instance.visible = true;
instance.dom = instance.$el;
instance.dom.style.zIndex = PopupManager.nextZIndex();
let verticalOffset = options.offset || 0;
instances.filter(item => item.position === position).forEach(item => {
verticalOffset += item.$el.offsetHeight + 16;
});
verticalOffset += 16;
instance.verticalOffset = verticalOffset;
instances.push(instance);
return instance;
};
['success', 'warning', 'info', 'error'].forEach(type => {
Notification[type] = options => {
if (typeof options === 'string' || isVNode(options)) {
options = {
message: options
};
}
options.type = type;
return Notification(options);
};
});
Notification.close = function(id, userOnClose) {
let index = -1;
const len = instances.length;
const instance = instances.filter((instance, i) => {
if (instance.id === id) {
index = i;
return true;
}
return false;
})[0];
if (!instance) return;
if (typeof userOnClose === 'function') {
userOnClose(instance);
}
instances.splice(index, 1);
if (len <= 1) return;
const position = instance.position;
const removedHeight = instance.dom.offsetHeight;
for (let i = index; i < len - 1; i++) {
if (instances[i].position === position) {
instances[i].dom.style[instance.verticalProperty] =
parseInt(instances[i].dom.style[instance.verticalProperty], 10) - removedHeight - 16 + 'px';
}
}
};
Notification.closeAll = function() {
for (let i = instances.length - 1; i >= 0; i--) {
instances[i].close();
}
};
export default Notification;
这个逻辑也不难理解,主要分一下几个步骤:
之前创建的 vue 组件,通过
Vue.extend生成一个子类1
const NotificationConstructor = Vue.extend(Main);
这个可以理解为
notification的构造函数,只要new初始化这个函数,就可以生成一个notification的实例化对象:1
2
3instance = new NotificationConstructor({
data: options
});所以
Notification这个对象其实就是工厂函数,只要被调用,那么就会实例化一个拥有 notification vue 组件的全新的对象。实例化对象进行挂载,并且添加到 body 中,显示出来
1
2instance.$mount(); //没有 el 参数,就会挂载到一个未挂载的实例,模板将被渲染为文档之外的的元素
document.body.appendChild(instance.$el); // 这时候必须使用原生 DOM API 把它插入文档中接下来就是这个
Notification这个对象的其他方法,比如close之类的,同时还有一个处于闭包状态的全局对象instances来存放这些实例化的对象,并通过 id 对这些实例进行操作
总的来说,逻辑其实并不复杂。
最后的 index.js
最后的 index.js 其实就是导出这个结构体对象,notification/index.js:1
2import Notification from './src/main.js';
export default Notification;
挂载到 vue 原型
接下来就是挂载了,一样写在 components/index.js 的 install 方法中,不过这一次不用 component 语法 而是直接挂载到 vue 原型上:1
2
3
4
5
6
7
8
9
10
11
12
13
14
15
16
17
18
19import Button from './button'
import ButtonGroup from './button-group'
import Notification from './notification'
const components = {
Button,
ButtonGroup
}
const install = function (Vue) {
Object.keys(components).forEach(key => {
Vue.component(components[key].name, components[key])
})
Vue.prototype.$notify = Notification
}
export default {
install
}
当然也不能忽略了他的 scss 文件,所以 src/styles/index.scss 也要加上:1
2
3
4@import "./base.scss";
@import "./button.scss";
@import "./button-group.scss";
@import "./notification.scss";
写例子了
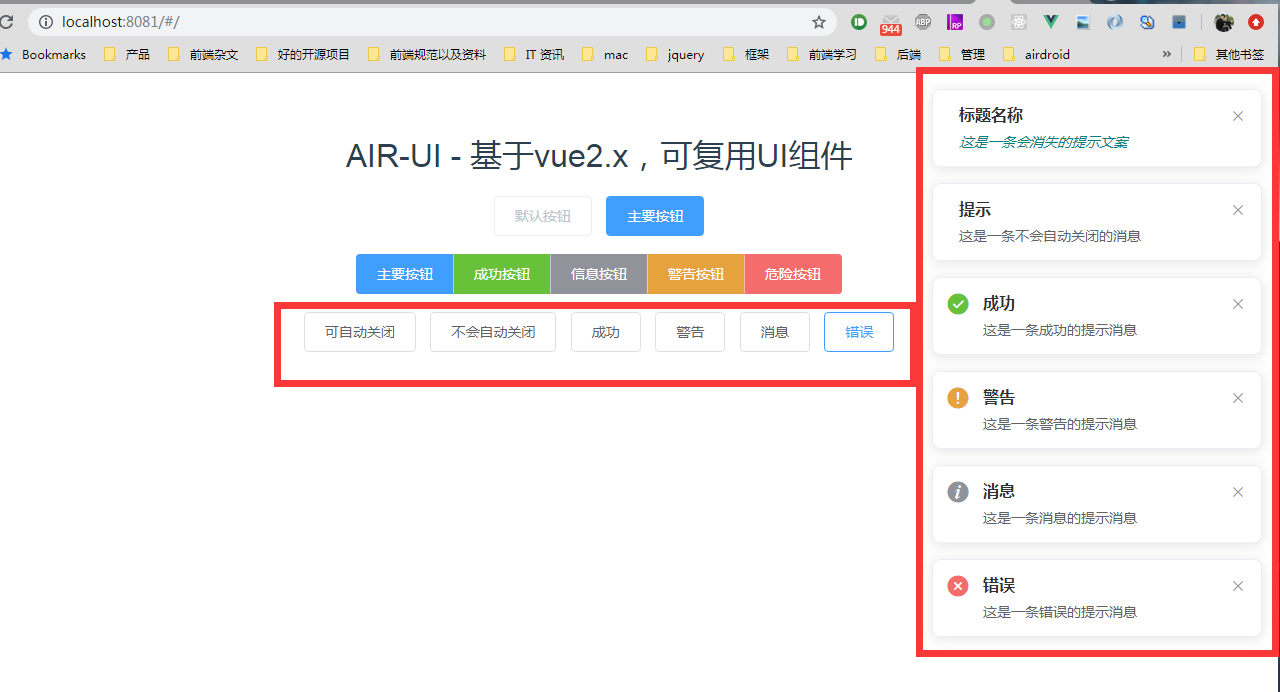
接下来就是写例子了,在 home.vue 补上例子:1
2
3
4
5
6<air-button plain @click="open1">可自动关闭</air-button>
<air-button plain @click="open2">不会自动关闭</air-button>
<air-button plain @click="open3">成功</air-button>
<air-button plain @click="open4">警告</air-button>
<air-button plain @click="open5">消息</air-button>
<air-button plain @click="open6">错误</air-button>
script 补上对应的触发方法:1
2
3
4
5
6
7
8
9
10
11
12
13
14
15
16
17
18
19
20
21
22
23
24
25
26
27
28
29
30
31
32
33
34
35
36
37
38
39
40
41
42
43
44
45
46
47
48
49
50
51<script>
export default {
data () {
return {
msg: `AIR-UI - 基于vue2.x,可复用UI组件`
}
},
methods: {
open1() {
const h = this.$createElement;
this.$notify({
title: '标题名称',
message: h('i', { style: 'color: teal'}, '这是一条会消失的提示文案')
});
},
open2() {
this.$notify({
title: '提示',
message: '这是一条不会自动关闭的消息',
duration: 0
});
},
open3() {
this.$notify({
title: '成功',
message: '这是一条成功的提示消息',
type: 'success'
});
},
open4() {
this.$notify({
title: '警告',
message: '这是一条警告的提示消息',
type: 'warning'
});
},
open5() {
this.$notify.info({
title: '消息',
message: '这是一条消息的提示消息'
});
},
open6() {
this.$notify.error({
title: '错误',
message: '这是一条错误的提示消息'
});
}
}
}
</script>
注意调用的方式: this.$nofify ,接下来就可以看效果了:
这样子一个内置服务的组件,就创建成功了。
注意
这边要注意一点的是,内置服务的组件,不能使用 Vue.use() 来调用,否则项目运行会默认执行一次,即使没有使用它们,举个例子,比如我在 src/main.js 改成换成对 notification 显示挂载和 use 的引用:1
2
3
4import Notification from './components/notification'
Vue.prototype.$notify = Notification
Vue.use(Notification)
这样子,编译是没问题的,但是我加载页面的时候,会默认弹出一个空的弹出框??
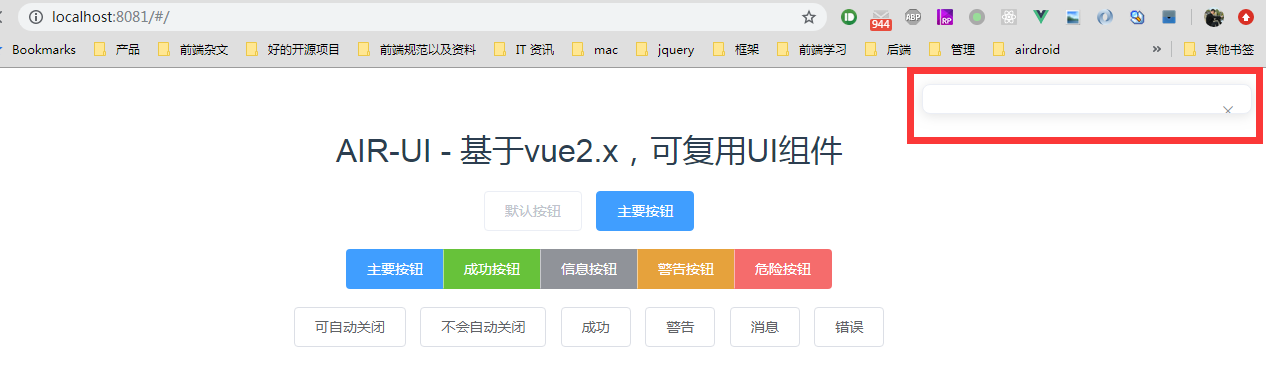
这个是因为我调用 use 的时候,就会默认执行一次 Notification 对象,从而实例化一个 notification 的对象,但是因为没有传入任何参数,所以是一个空的弹出框。 所以对于这种内置服务组件,比如 Notification, Message, MessageBox, 只要有绑定到 vue 原型对象就行了,不用 use 来引入。
总结
内置服务组件的创建,大概就这样。下节我们讲怎么创建一个指令组件。
系列文章:
自建vue组件 air-ui (1) -- 为啥我要自建一个类 element ui 的组件
自建vue组件 air-ui (2) -- 先分析一下 element ui 项目
自建vue组件 air-ui (3) -- css 开发规范
自建vue组件 air-ui (4) -- air-ui 环境搭建和目录结构
自建vue组件 air-ui (5) -- 创建第一个组件 Button
自建vue组件 air-ui (6) -- 创建内置服务组件
自建vue组件 air-ui (7) -- 创建指令组件
自建vue组件 air-ui (8) -- 实现部分引入组件
自建vue组件 air-ui (9) -- 用 vuepress 写文档
自建vue组件 air-ui (10) -- vuepress 写文档 (进阶版)
自建vue组件 air-ui (11) -- vuepress 写文档 (爬坑版)
自建vue组件 air-ui (12) -- 国际化机制
自建vue组件 air-ui (13) -- 国际化机制(进阶版)
自建vue组件 air-ui (14) -- 打包构建(dev 和 dist)
自建vue组件 air-ui (15) -- 主题定制
自建vue组件 air-ui (16) -- 打包构建 pub 任务
自建vue组件 air-ui (17) -- 开发爬坑篇以及总结