前言
之前花了两个篇幅,讲了 sentry 的 部署和邮件客户端的配置:
本篇我们讲一下,怎么在项目中引入 sdk 并且抛送 bug 统计, 因为 sentry 支持很多语言:
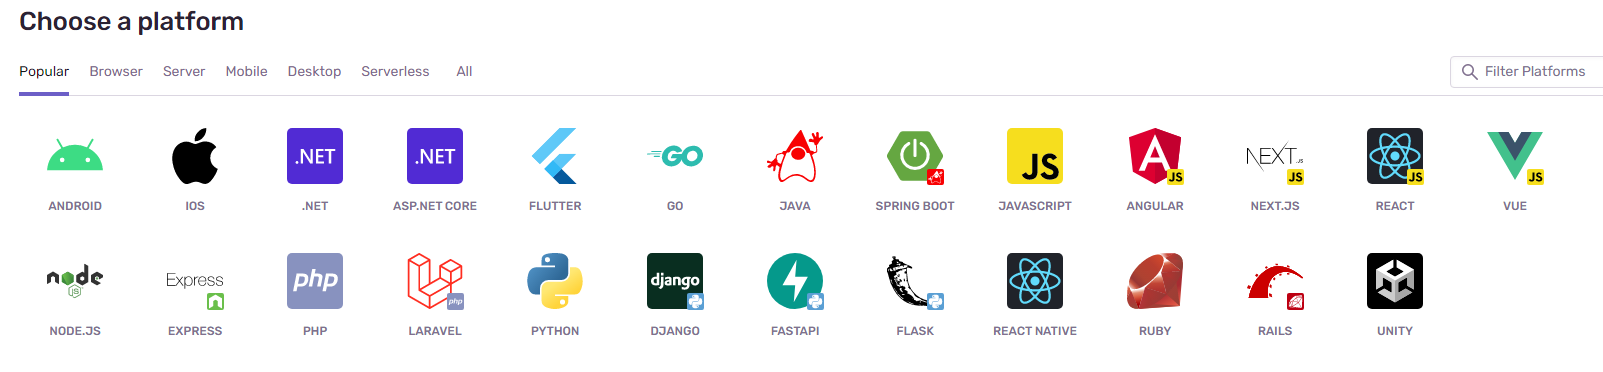
但是我们的初衷是用来做前端 bug 追踪系统的, 所以还是以 js 为主, 但是即使平台是 js,但是 sdk 也是很多种:
- @sentry/browser: SDK for Browsers
- @sentry/node: SDK for Node including integrations for Express
- @sentry/angular: Browser SDK with Angular integration enabled
- @sentry/ember: Browser SDK with Ember integration enabled
- @sentry/react: Browser SDK with React integration enabled
- @sentry/svelte: Browser SDK with Svelte integration enabled
- @sentry/vue: Browser SDK with Vue integration enabled
- @sentry/gatsby: SDK for Gatsby
- @sentry/nextjs: SDK for Next.js
- @sentry/remix: SDK for Remix
- @sentry/integrations: Pluggable integrations that can be used to enhance JS SDKs
- @sentry/serverless: SDK for Serverless Platforms (AWS, GCP)
- @sentry/electron: SDK for Electron with support for native crashes
- @sentry/react-native: SDK for React Native with support for native crashes
- @sentry/capacitor: SDK for Capacitor Apps and Ionic with support for native crashes
看了一下他的开发文档: Installation Methods, 他主要有 3 种方式来引入 js
- NPM 包 引入
- CDN js 引入
- 懒加载方式(使用加载器) 引入
本节我们就各自演示一下这个 demo
1. CDN 的方式引入 js
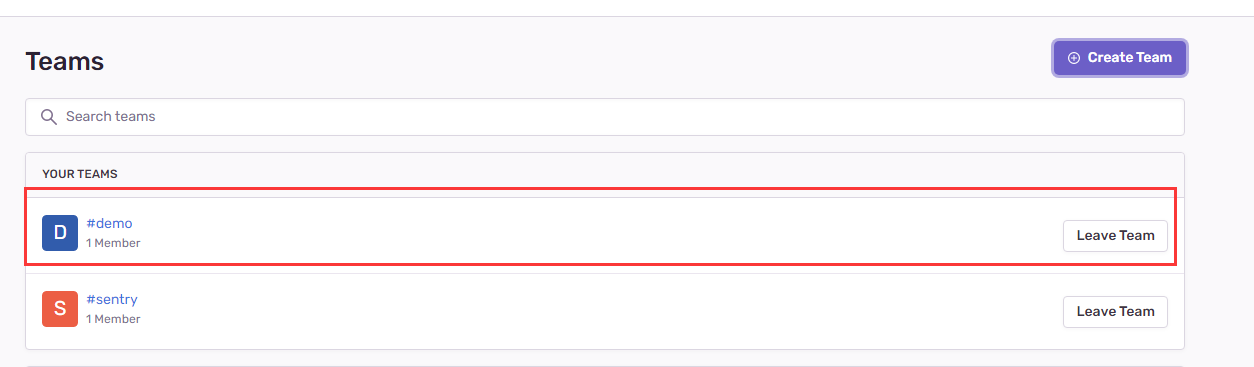
先建一个 team, 叫做 demo ,然后在里面再创建一个项目,叫做 test_1
创建的时候,会选择语言平台, 我们的 test_1, 就直接用原生的 js 来测试,所以选择 javascript

这边选择有报错的时候, 直接发警报。然后接下来就有 代码示例了,不过他这个代码示例走的是 NPM 包的方式,我们要改成 CDN 的方式引入, 在这边 有提供的官网的 cdn 链接
1. demo 1
然后我们选择的是 browser + tracing 这两个包合并打包的 js 文件(项目示例也是导入这两个包),即 bundle.tracing.min.js, 简单的代码如下:
就两个文件,一个是 html 文件,一个是 app.js1
2
3
4
5
6
7
8
9
10
11
12
13
14
15
16
17
<html>
<head>
<meta charset="utf-8" />
<title>sentry CDN SDK examples</title>
<script
src="https://browser.sentry-cdn.com/7.16.0/bundle.tracing.min.js"
integrity="sha384-wXU9CL14HxNQidSEdsPNgsvTyYYWogbqur94ac59B5M+zWrBqgC7NRLzv1AHdz0j"
crossorigin="anonymous"
></script>
<script src="app.js"></script>
</head>
<body>
demo test_1
</body>
</html>
1 | Sentry.init({ |
注意这个 dsn 就是具体抛送的后端所在项目的地址,可以在具体项目的配置页面的
Client Keys(CSN)看到,每一个项目的 dsn 都是不一样的
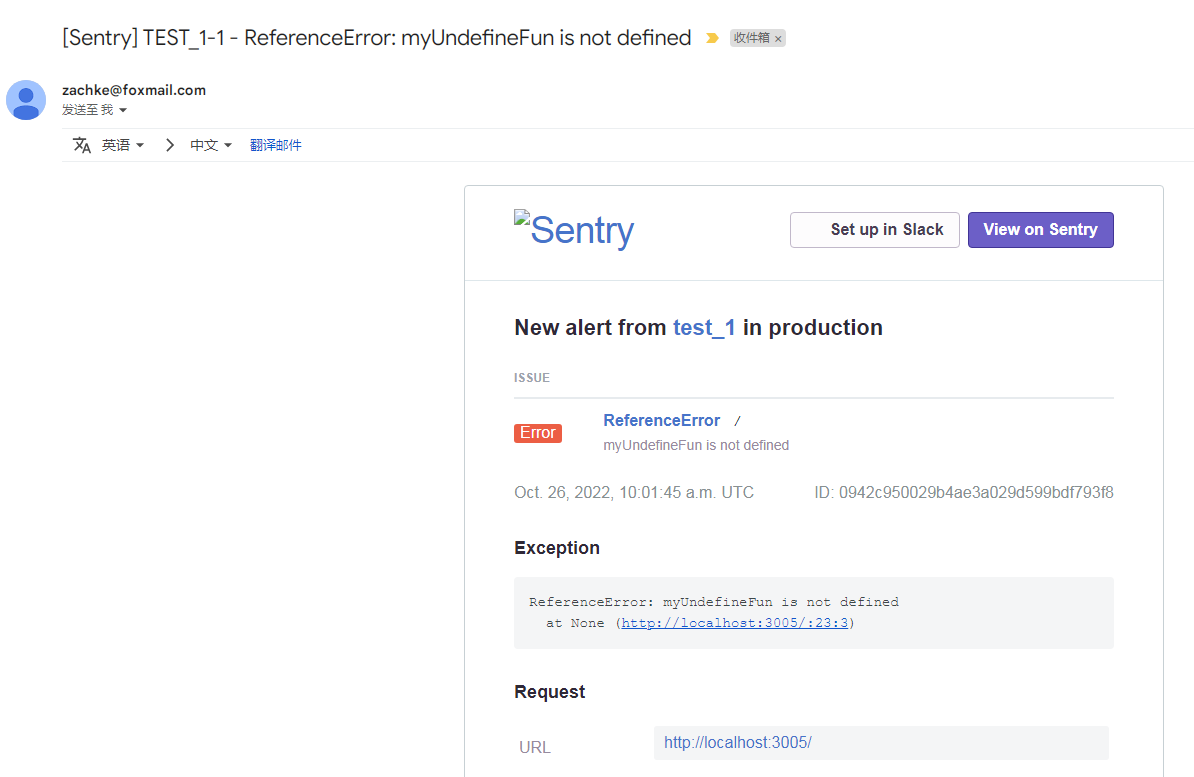
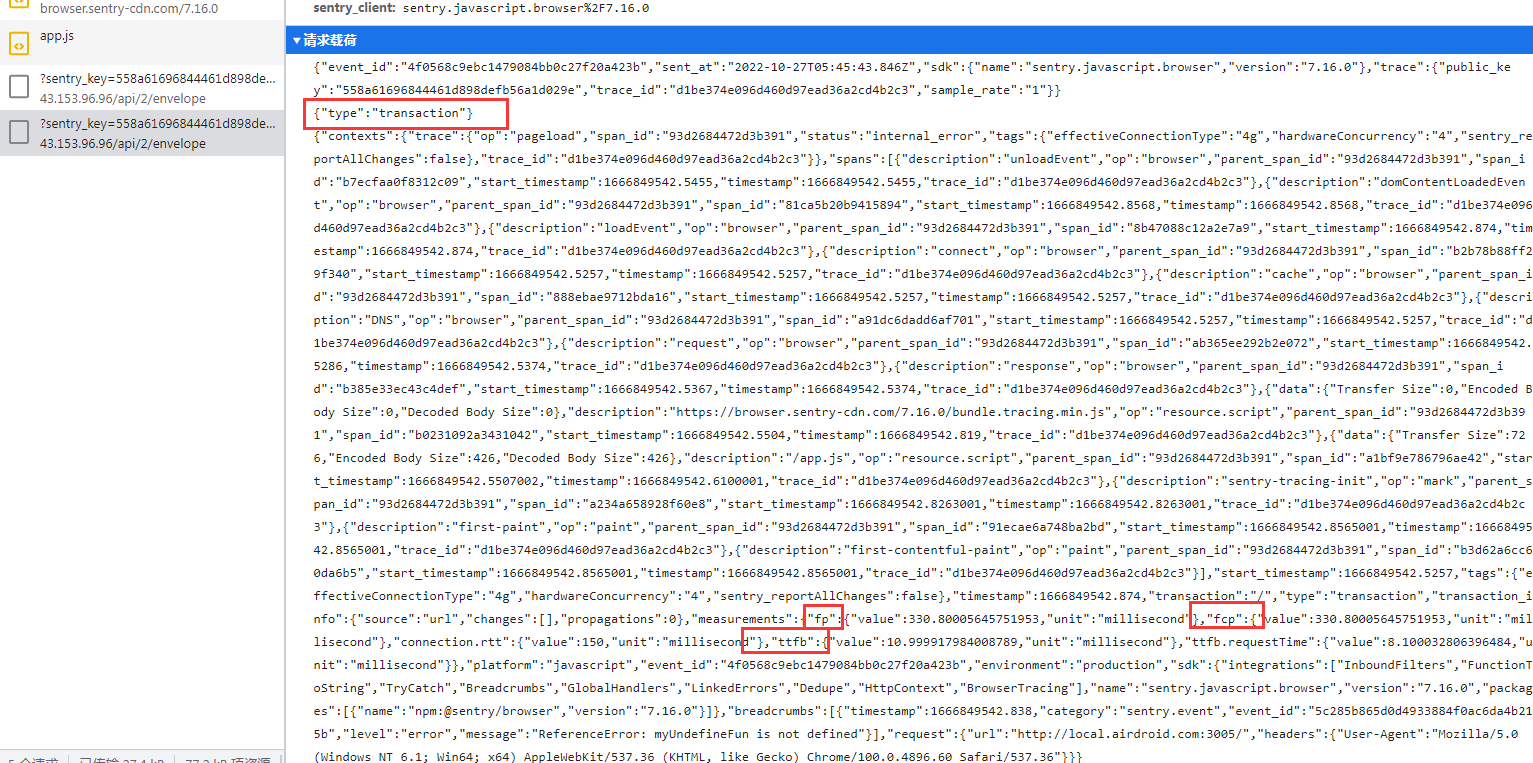
因为这个 myUndefineFun() 会报错, 所以访问一下,就会出现抛送数据了:
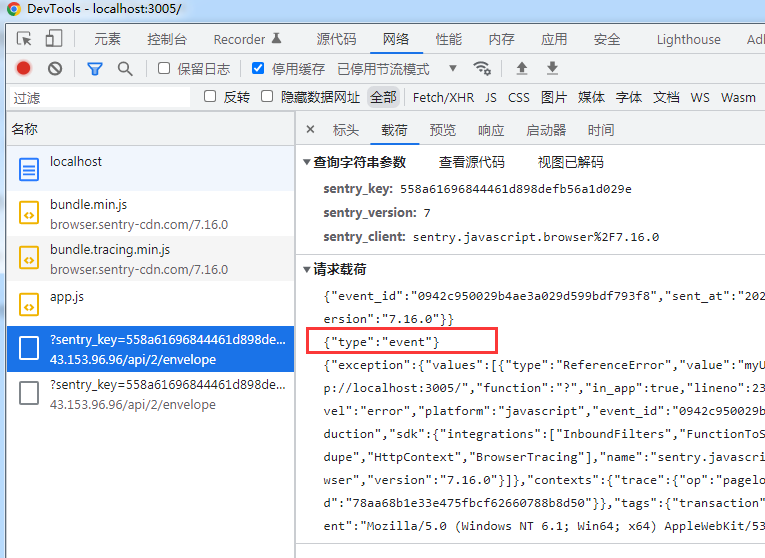
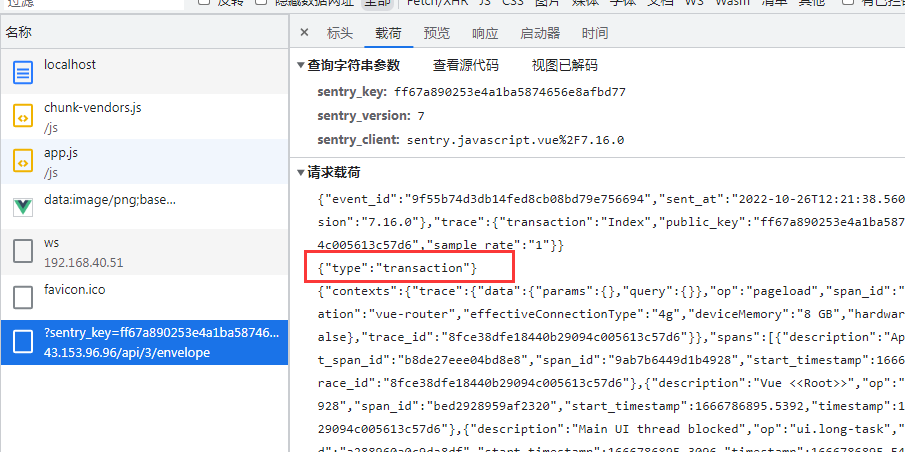
可以看到抛送了两个请求,看了一下 payload,发现一个是 event ,一个是 transaction, 其中 event 事件就是抛送那个 undefined 的那个错误回报,也就是 browser sdk 的行为。
而另一个 transaction 抛送的是该页面的一些性能数据,就是 tracing sdk 处理的。
然后这时候回到后台就可以看到这个报错的记录了:
这边 issue 记录就有一条, 点进去看详情

这边可以看到具体的 issues 错误类型, 而且因为创建项目的时候,有设置 mail alert,所以我的邮件也会收到这个 issue 的通知
2. demo2 - 去除 tracing
因为引入的 tracing 这个 sdk 只是用来对页面进行性能加载分析的, 也就是 web 指标那些,比如 lcp , fcp , cls 之类的, 对 bug 追踪没有用处。
在页面初始化的时候,就会抛送这个请求, 然后可以在后台查看项目的加载性能相关
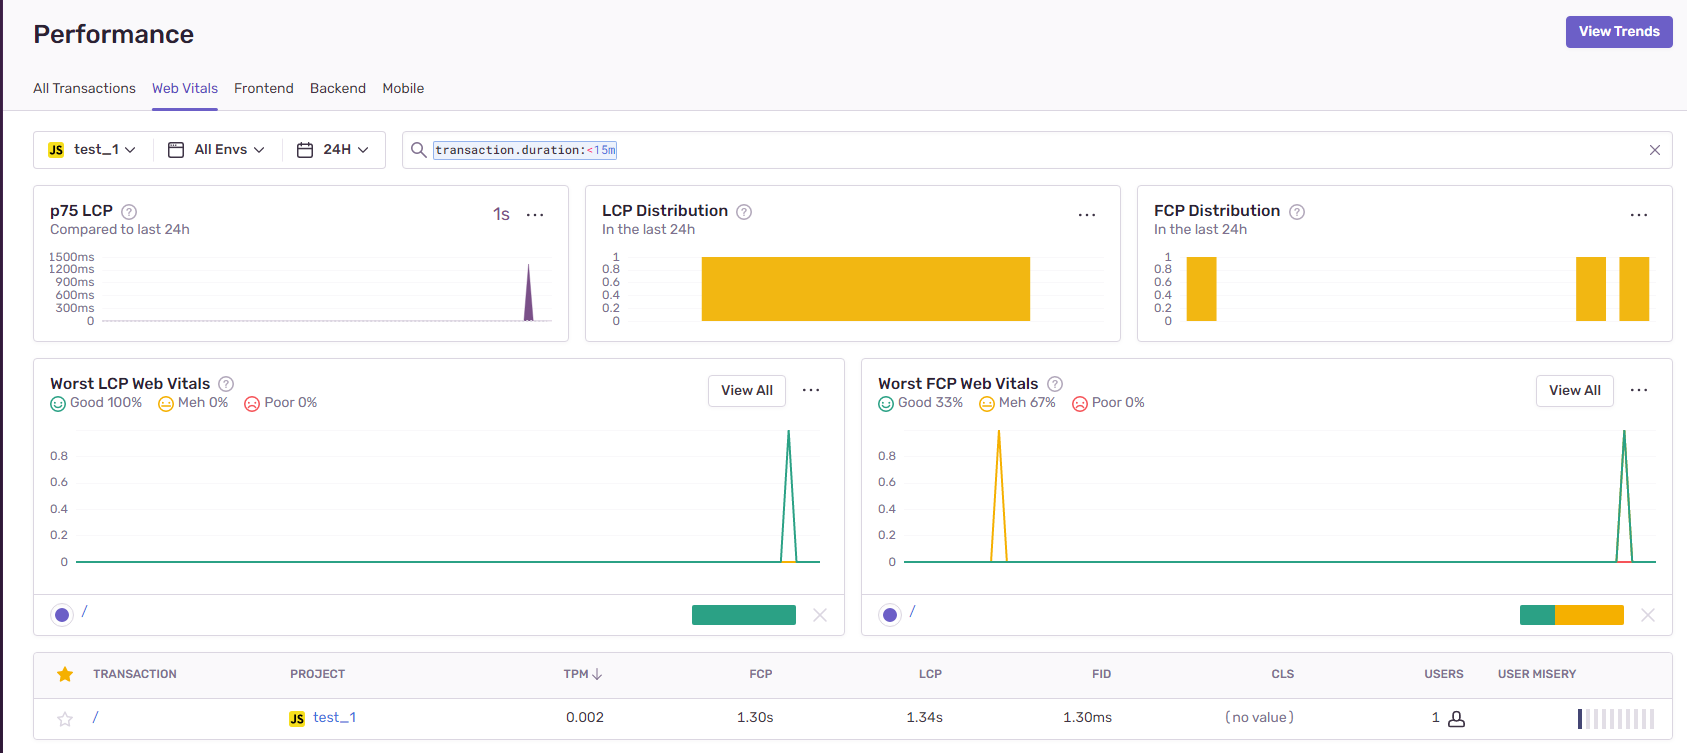
所以如果你的项目有对这方面的性能加载需求的话, 是可以引入的, 但是如果只是单纯的想抛送 bug 的话,那么是没必要引入这个 js 的。 所以可以写(换成 bundle.min.js):1
2
3
4
5
6
7
8
9
10
11
12
13
14
15
16
<html>
<head>
<meta charset="utf-8" />
<title>sentry CDN SDK examples</title>
<script
src="https://browser.sentry-cdn.com/7.16.0/bundle.min.js"
integrity="sha384-70hBom53vQV6XVoqnEzSlfP8AYzEm6CSuti85YyRLtmm/jbx0GryCQ1z5StcQwsz"
crossorigin="anonymous"></script>
<script src="app.js"></script>
</head>
<body>
demo test_1
</body>
</html>
1 | Sentry.init({ |
执行一下,这样子就只会抛送一个 event, 不会再抛送 transaction 了。
3. demo3 - 自定义抛送错误信息
之前的两个 demo 都是因为语法错误导致的错误信息抛送的, 其实我们更常用到的是自定义错误的抛送, sentry 提供了两个方法来抛送自定义错误,比如:
Sentry.captureException(new Error("custom error"));});-> 抛送一个 json 格式的错误信息Sentry.captureMessage("Something went wrong");-> 抛送一个文本格式的错误信息
我们一般都是用第一种,也就是抛送一个 json 格式的错误信息,比如下面的例子就是抛送了一个附带额外信息的一个错误类型,并且有设置了一个 tag 标签(tag 其实很好用,可以用来快速过滤和检索)1
2
3
4
5
6
7
8
9
10
11
12
13
14
15
16
17
18Sentry.captureException(new Error("webrtc something went wrong"), {
// 添加 tag
tags: {
action: "webrtc",
},
// 添加额外数据
extra: {
deviceId: "12123445",
msg: "webrtc connect err",
detail: [
"11111111111111111111111111111111",
"222222222222222222222222222222222",
"322222222222222222222222222222222",
"422222222222222222222222222222222",
"522222222222222222222222222222222"
]
}
});
这时候在后台就可以看到

点进去就可以看到自定义的标签有显示:

抛送的附加数据也有显示:

还可以再更近一步,就是自定义错误类型,不然列表页显示的标题都是 Error, 辨识度非常低,所以可以自定义 Error 对象:1
2
3
4
5
6
7
8
9
10
11
12
13
14
15
16
17
18
19
20
21
22
23
24
25
26
27
28
29
30
31
32
33function WebRtcError(message) {
this.message = message
this.name = 'WebRtcError'
/*
* Error.captureStackTrace(targetObject[, constructorOpt])
* 参数 targetObject -> 表示一个对象
* 参数 constructorOpt -> 表示对象的构造函数
* 在targetObject上创建一个.stack属性, 调用是返回一个调用 Error.captureStackTrace() 的位置的字符串。
*/
Error.captureStackTrace(this, WebRtcError)
}
WebRtcError.prototype = new Error()
WebRtcError.prototype.constructor = WebRtcError
Sentry.captureException(new WebRtcError("webrtc something went wrong"), {
// 添加 tag
tags: {
action: "webrtc",
},
// 添加额外数据
extra: {
deviceId: "12123445",
msg: "webrtc connect err",
detail: [
"11111111111111111111111111111111",
"222222222222222222222222222222222",
"322222222222222222222222222222222",
"422222222222222222222222222222222",
"522222222222222222222222222222222"
]
}
});
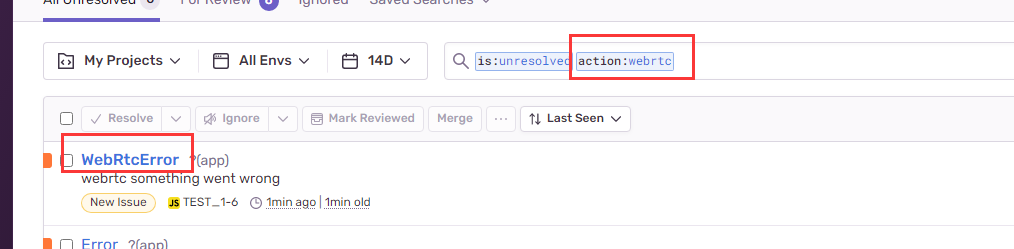
这时候抛送的时候,标题就不是千遍一律的 Error 了,而是变成我们自定义的 WebRtcError:
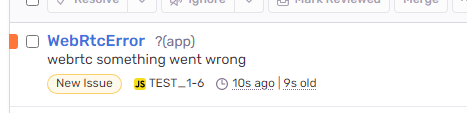
而且上面还可以根据标签来筛选:
2. NPM 包的方式引入 js
这一次就新建一个 vue3 的项目来引入 sdk,一样先创建一个新的项目 test_vue,选择 vue 平台,这时候创建的时候,就有很详细的实例代码了。
因为都要新项目,所以为了简单一点,我直接用 vue 的脚手架来创建项目:1
2npm install -g @vue/cli
vue create test-vue
这样子新项目就创建完了,接下来添加这两个包 (可以决定是否需要 tracing 包):1
yarn add @sentry/vue @sentry/tracing
然后调整 main.js 的代码如下:1
2
3
4
5
6
7
8
9
10
11
12
13
14
15
16
17
18
19
20
21
22
23
24
25
26
27
28
29
30
31
32
33
34
35
36
37
38
39
40
41import { createApp } from 'vue'
import App from './App.vue'
import { createRouter, createWebHashHistory } from 'vue-router'
import * as Sentry from "@sentry/vue";
import { BrowserTracing } from "@sentry/tracing";
const app = createApp(App);
const router = createRouter({
history: createWebHashHistory(),
routes: [
{
path: '/',
name: 'Index',
component: App
},
{
path: '/:pathMatch(.*)*',
name: 'NotFound',
redirect: '/'
}
]
})
Sentry.init({
app,
dsn: "http://ff67a890253e4a1ba5874656e8afbd77@43.xx.xx.96:9000/3",
integrations: [
new BrowserTracing({
routingInstrumentation: Sentry.vueRouterInstrumentation(router),
tracingOrigins: ["localhost", "my-site-url.com", /^\//],
}),
],
// Set tracesSampleRate to 1.0 to capture 100%
// of transactions for performance monitoring.
// We recommend adjusting this value in production
tracesSampleRate: 1.0,
});
app.use(router);
app.mount("#app");
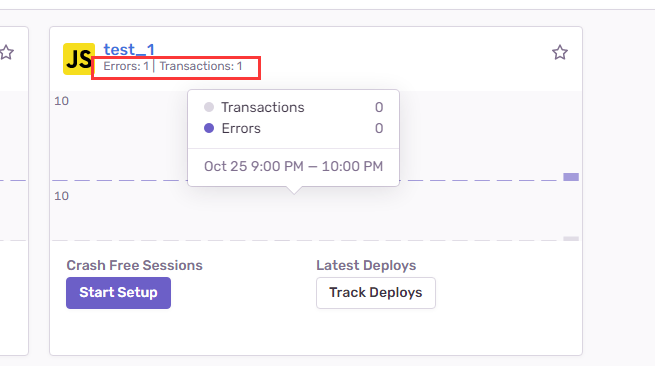
然后运行起来就可以看到有抛送 transaction 请求了
这时候可以在 vue 组件中,随便抛送一个错误,比如这样子:1
2
3
4
5
6
7
8Sentry.captureException(new Error("pay something went wrong"), {
tags: {
action: "pay",
},
extra: {
accountId: "123"
}
});
这时候就可以看到这个错误信息抛送了。跟 cdn 引入的方式没啥差别
3. 用加载器进行来加载的方式
他的官方文档有介绍第三方引入 sdk 的方式: Lazy-Loading Sentry, 通过这种方式,刚开始只需要下载一个不到 1kb 的 加载器,然后等待真的有抛送错误的时候,再去加载实际的 js
按照他的配置方式,我确实有在后台上找到这个 loader js
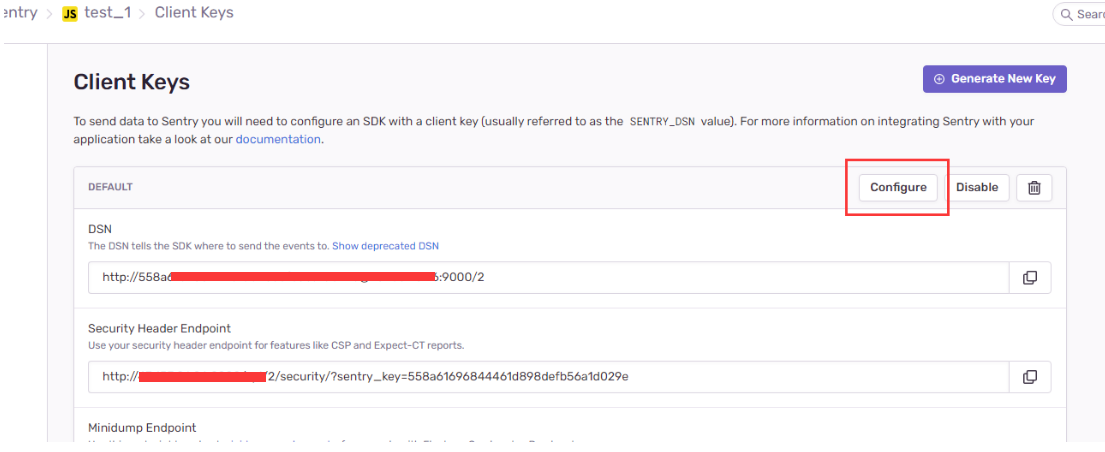
先到项目的 Client Keys 页面,然后点击右上角的 Configure, 这时候就可以看到这个 loader 的 配置

但是直接加载这个 js,发现报了这个错误

显示这种方式已经不再使用,不知道是只有本地部署的时候,不能用, 还是连线上他们 SAAS 服务也不能用,这个也不得知,反正我自己搭建的这个,应该是用不了的
其他相关配置
上面的 demo 只是很简单的使用,实际上 sentry 的用法还是很丰富的,建议仔细读一下他们的官方文档: Sentry javascript platforms
sentry 这个对象的主要方法就这几个:1
2
3
4
5
6
7
8
9
10
11
12var Sentry = {
addBreadcrumb: _sentry_noopWarning,
captureEvent: _sentry_noopWarning,
captureException: _sentry_noopWarning,
captureMessage: _sentry_noopWarning,
configureScope: _sentry_noopWarning,
forceLoad: _sentry_noopWarning,
init: _sentry_noopWarning,
onLoad: _sentry_noopWarning,
showReportDialog: _sentry_noopWarning,
withScope: _sentry_noopWarning,
};
但是最核心的其实就是他的初始化配置,也就是 init 方法: 官网大部分的篇幅都在将 init 的各个配置项的含义: Configuration
有一个大家经常会用到的场景就是怎么限制抛送速率,尤其是对不同类型错误的抛送速率,其实有几个配置可以设置:
- 直接通过
sampleRate配置,这个就很简单粗暴了,范围为 0.0 到 1.0。默认值为 1.0,这意味着发送 100% 的错误事件。如果设置为 0.1,则只会发送 10% 的错误事件。事件是随机挑选的 - 通过
denyUrls和allowUrls配置不允许抛送和允许抛送的 url,以 denyUrls 来说,默认情况下,将发送所有错误。这是对整个文件 URL 的“包含”匹配。因此,如果您将 foo.com 添加到其中,它也会在https://bar.com/myfile/foo.com上匹配。 也就是在这个页面上,他不会抛送错误 enabled: true, 如果为 false, 直接就不抛送事件beforeSend, 抛送之前执行的钩子,在这个函数里面,你可以对要抛送的数据进行二次编辑(类似于脱敏), 也可以直接返回 false,不抛送, 比较常见的用法除了对某些数据进行脱敏之前,还有就是对一些常见的错误可以抛弃掉,只抛送哪些不常见的或者是纯业务的错误数据- 通过
ignoreErrors过滤一些常见的,不重要的 error
1 | Sentry.init({ |
或者1
2
3
4
5
6
7
8
9
10
11Sentry.init({
dsn: "https://examplePublicKey@o0.ingest.sentry.io/0",
beforeSend(event) {
// Modify the event here
if (event.user) {
// Don't send user's email address
delete event.user.email;
}
return event;
},
});
或者1
2
3
4
5
6
7
8
9
10
11
12
13
14Sentry.init({
// ...
beforeSend(event, hint) {
const error = hint.originalException;
if (
error &&
error.message &&
error.message.match(/database unavailable/i)
) {
event.fingerprint = ["database-unavailable"];
}
return event;
},
});
或者1
2
3
4
5
6
7
8
9
10
11
12
13
14
15
16
17
18
19document.body.addEventListener(
"error",
event => {
if (!event.target) return;
if (event.target.tagName === "IMG") {
Sentry.captureMessage(
`Failed to load image: ${event.target.src}`,
"warning"
);
} else if (event.target.tagName === "LINK") {
Sentry.captureMessage(
`Failed to load css: ${event.target.href}`,
"warning"
);
}
},
true // useCapture - necessary for resource loading errors
);
相关 Sentry 系列文章:
- bug 追踪系统 Sentry (1) -- 单机安装
- bug 追踪系统 Sentry (2) -- 账号初始化和邮件发送配置
- bug 追踪系统 Sentry (3) -- 项目引入 sdk 抛送 bug
- bug 追踪系统 Sentry (4) -- 关联 sourceMap
参考资料: