前言
之前通过 bug 追踪系统 Sentry (1) -- 单机安装 我们成功在单机上部署了 sentry 服务,这一节我们讲进入后台的账号初始化和邮件发送配置。
账号初始化
其实在执行 instaill.sh 脚本的时候, 就会有用户初始化账号的引导流程,只不过我之前是通过 --skip-user-prompt 来跳过这个交互。
所以安装完之后,我们就要通过 docker-compose run --rm web createuser 来创建初始账号,具体执行如下1
[root@VM-64-9-centos self-hosted-master]# docker-compose run --rm web createuser
并且在设置的过程中,也可以指定设置为 superuser 权限
接下来就可以成功用这个账号登录后台了, 刚登录的时候,有一个配置项页面:
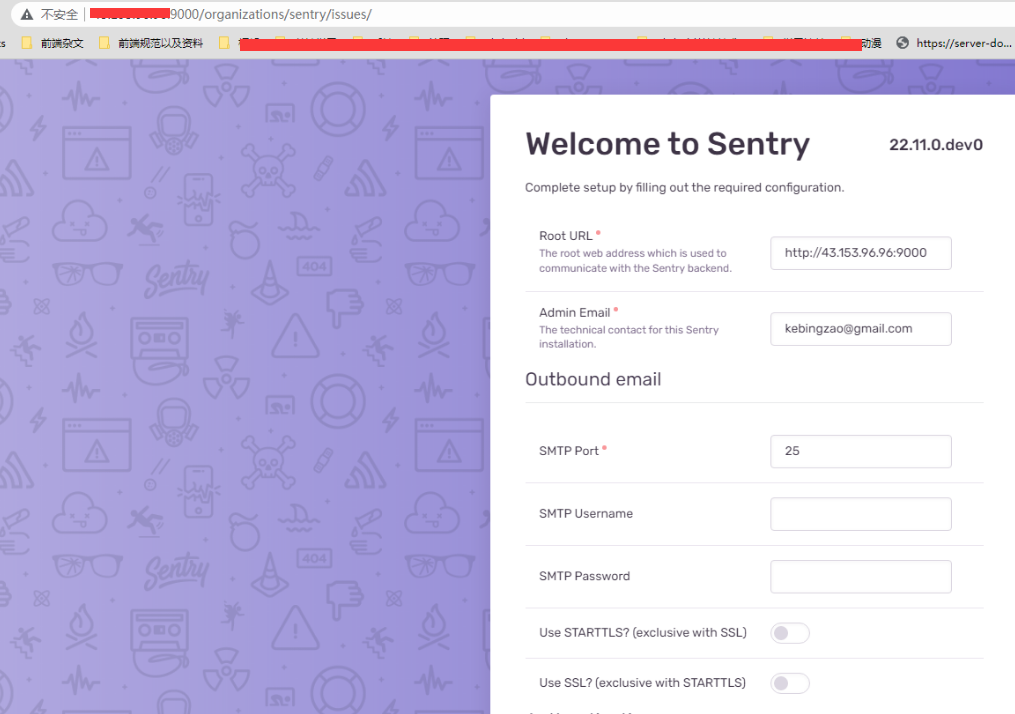
主要是邮件发送的配置, 这一块先不在这边配(因为没办法在这边配置 mail from, 所以后面统一通过配置文件配置),直接点击 Coutinue 进入主页面
邮件发送客户端配置
接下来我们进行邮件客户端配置,qq 邮箱有提供 IMAP 服务(Internet Message Access Protocol(互联网邮件访问协议)), 我们可以用他来做邮件客户端,来发送邮件。
1. 开始 qq 邮箱的 IMAP 服务
首先先开启我的 qq 邮箱的 IMAP 服务,这边有教程: 如何使用IMAP服务?
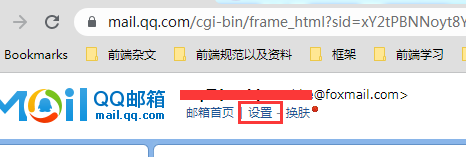
- 首先进入 qq 邮箱后台,然后点击设置
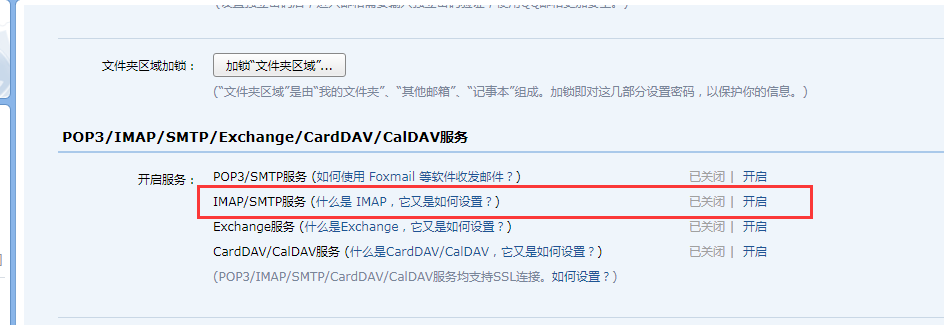
- 选择 【帐户】,再选中开启 IMAP 服务
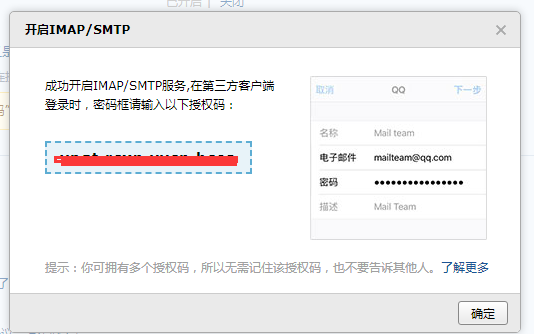
点击开启, 这边会有一个简单的短信验证, 短信验证通过之后,就会有一个授权码 (这个就是下面配置邮件客户端的密码)
2. 在 sentry 配置邮件客户端
接下来直接修改 sentry/config.yml (docker-compose 执行所在目录),将原来的:1
2
3
4
5
6
7
8
9
10
11
12
13
14
15
16
17
18
19###############
# Mail Server #
###############
# mail.backend: 'smtp' # Use dummy if you want to disable email entirely
mail.host: 'smtp'
# mail.port: 25
# mail.username: ''
# mail.password: ''
# mail.use-tls: false
# mail.use-ssl: false
# NOTE: The following 2 configs (mail.from and mail.list-namespace) are set
# through SENTRY_MAIL_HOST in sentry.conf.py so remove those first if
# you want your values in this file to be effective!
# The email address to send on behalf of
# mail.from: 'root@localhost' or ...
改成:1
2
3
4
5
6
7
8
9
10
11
12
13
14
15
16
17
18
19###############
# Mail Server #
###############
# mail.backend: 'smtp' # Use dummy if you want to disable email entirely
mail.host: 'smtp.qq.com'
mail.port: 587
mail.username: 'xxx@foxmail.com'
mail.password: 'xxxxxxxnvvcnbcea'
mail.use-tls: true
mail.use-ssl: false
# NOTE: The following 2 configs (mail.from and mail.list-namespace) are set
# # through SENTRY_MAIL_HOST in sentry.conf.py so remove those first if
# # you want your values in this file to be effective!
#
#
# # The email address to send on behalf of
mail.from: 'xxx@foxmail.com'
注意几个细节:
- 这边的 username 和 mail.from 就是刚才开启 qq 邮箱 IMAP 服务的那个邮箱账号, 对于 qq 邮箱来说, 这两个要一致
- password 就是上面的授权码
- 这边有开启 tls 验证 (use-tls: true),所以上面的 port 要填 587 才行,如果不开启 tls 验证 (use-tls: false), port 填默认的 25 就行了
然后接下来重启 compose 服务,让配置生效:1
docker-compose restart
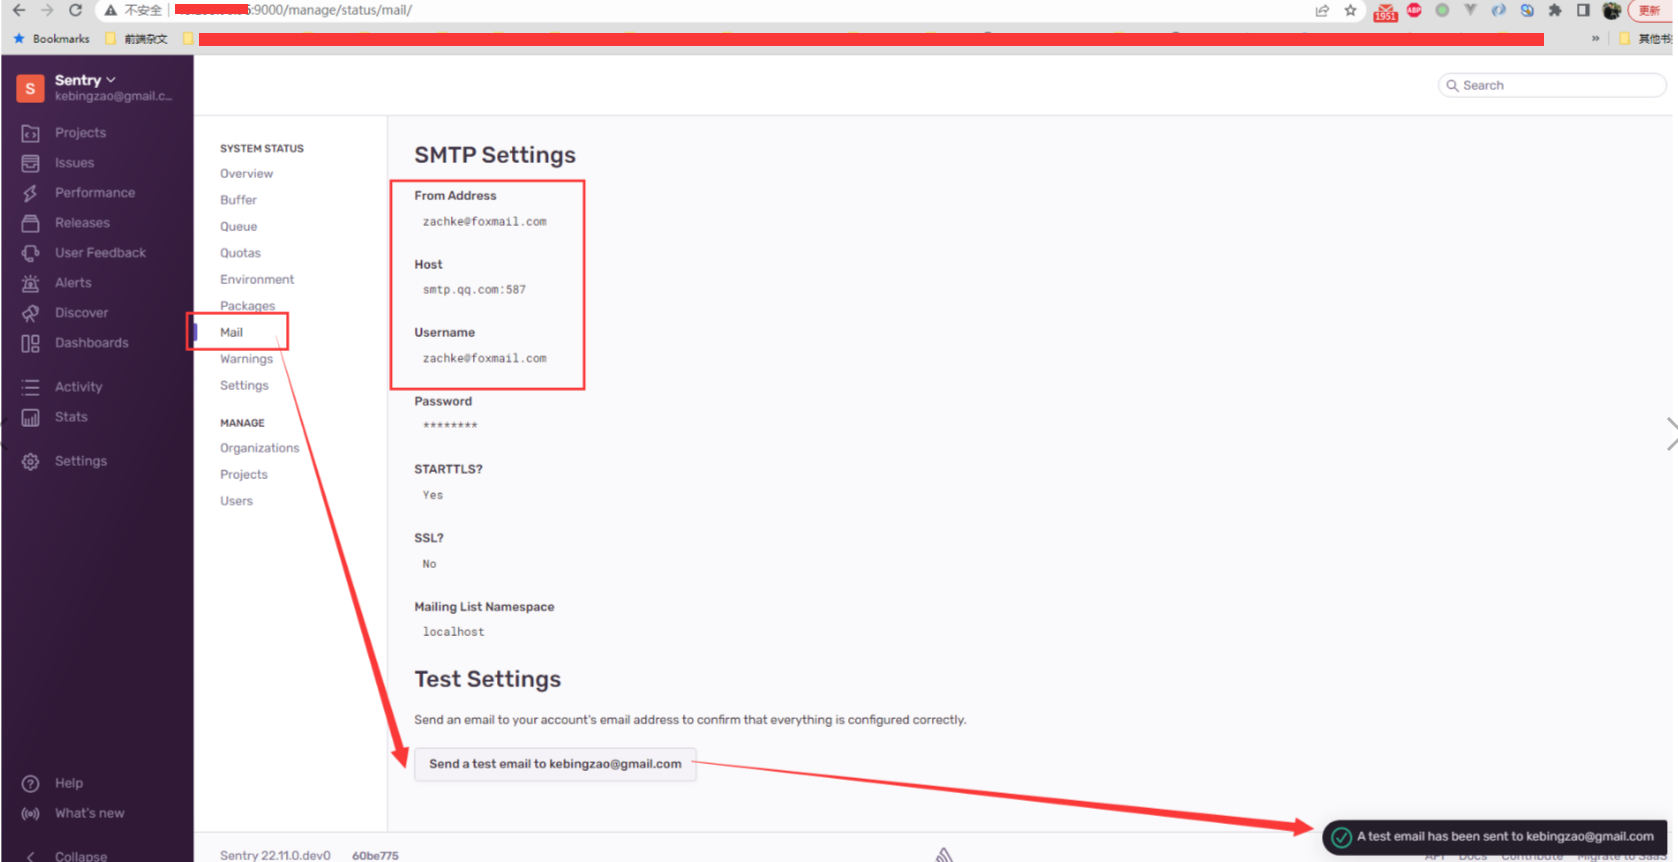
然后接下来进入后台,点击 admin - mail - 点击邮箱测试验证, 就可以看到发送验证邮件成功
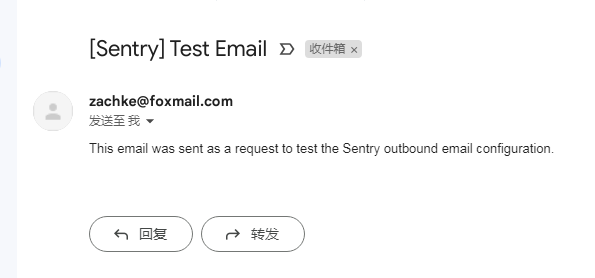
这时候就可以收到这一封验证邮件了
总结
这时候 sentry 的邮件客户端配置就成功了, 接下来不管是邀请成员,还是 issue alert 都会需要用到邮件发送功能。
注意,对于 qq 邮箱来说,mail.from 也要改成跟 username 一样,不然就会报下面那个错误:
有些邮箱不需要,但是国内的很多邮箱如果要开启 IMAP 服务的话,经常要保证你的 mail from 和 sender 要一致,具体可以看我之前的文章: AWS SES 发送邮件出现的代发字样问题

这也是为啥刚开始登录初始化的时候, 直接点 continue 就行了。 因为那个地方没办法改 mail from 的配置, 只能通过 sentry/config.yml 的这个配置才能修改。
所以后面就统一修改 sentry/config.yml 配置就行了 (记得重启 compose )。
相关 Sentry 系列文章:
- bug 追踪系统 Sentry (1) -- 单机安装
- bug 追踪系统 Sentry (2) -- 账号初始化和邮件发送配置
- bug 追踪系统 Sentry (3) -- 项目引入 sdk 抛送 bug
- bug 追踪系统 Sentry (4) -- 关联 sourceMap
参考资料: