前言
前段时间正在学习 kubernetes, 一般在刚开始学习的时候,都会先本地安装一下,然后逐渐学习。 而安装的话,也分三个过程,由简到难:
- 本地单机安装 – Minikube
- 集群安装 – Kubeadm – 请看 CentOS7 手动安装 Kubeadm 集群环境
- 二进制包安装 – 请看 CentOS7 使用二进制包安装 kubernetes 集群环境
本文主要讲本地单机安装 Minikube 的安装过程和简单的使用过程。
本机环境
线上关于这种的安装教程其实很多,但是因为 kubernetes 的快速迭代,很多早期的安装教程,现在再照着方式再安装,其实很多时候就安装不了,所以在安装之前要先把一些环境先说明一下。
本机环境:
| 环境参数 | 值 |
|---|---|
| 系统 | CentOS 7 |
| CPU | 2 核 |
| 内存 | 4 G |
| minikube 版本 | v1.13.1 |
| kubectl 版本 | v1.19.2 |
| docker 版本 | v1.13.1 |
| 能否科学上网 | 能 (腾讯云位于美西的机器) |
几个细节:
- 因为我的环境可以科学上网,所以 kubectl 可以直接下载, 如果不能的话,那么就要换成 阿里云的 国内镜像也行的。
- minikube 只能用于学习 kubernetes 用, 只能单机, 不能用于生产环境。
开始安装
为了更直观的展示实际安装过程,我这边直接将 shell 执行的操作贴出来(可能会比较丑)。
1. 创建一个用户
因为不能用 root 来启动 minikube, 所以这边额外再创建一个账号角色: zach ,为了方便,将其设置为不需要密码, 后面就切换成这个账号来安装1
2
3
4
5
6
7
8[root@VM-64-15-centos ~]# useradd -m -s /bin/bash zach
[root@VM-64-15-centos ~]# vim /etc/sudoers
[root@VM-64-15-centos ~]# cat /etc/sudoers
...
root ALL=(ALL) ALL
zach ALL=(ALL) NOPASSWD:ALL
...
2. 安装 docker
1 | [root@VM-64-15-centos ~]# su zach |
这样子 docker 就安装好了
3. 添加docker组,将当前用户加入该组
1 | [zach@VM-64-15-centos root]$ sudo groupadd docker |
记得重启 docker
4. 安装 kubectl
1 |
|
这样就安装好了,还要进行一些授权操作。
5. 安装 minikube
1 | [zach@VM-64-15-centos root]$ sudo curl -Lo minikube https://github.com/kubernetes/minikube/releases/download/v1.13.1/minikube-linux-amd64 && sudo chmod +x minikube && sudo mv minikube /usr/local/bin/ |
6. 启动
1 | [zach@VM-64-15-centos root]$ minikube start --driver=docker |
这样就启动成功了。
7. 启动 dashboard 插件
1 | [zach@VM-64-15-centos root]$ minikube dashboard |
启动成功了, 但是这个 dashboard 内网可以访问,但是外网访问不了1
2
3
4
5
6
7
8
9
10
11
12
13
14
15
16
17
18
19
20
21
22[root@VM-64-15-centos ~]# curl http://127.0.0.1:40356/api/v1/namespaces/kubernetes-dashboard/services/http:kubernetes-dashboard:/proxy/
<!--
Copyright 2017 The Kubernetes Authors.
Licensed under the Apache License, Version 2.0 (the "License");
you may not use this file except in compliance with the License.
You may obtain a copy of the License at
http://www.apache.org/licenses/LICENSE-2.0
Unless required by applicable law or agreed to in writing, software
distributed under the License is distributed on an "AS IS" BASIS,
WITHOUT WARRANTIES OR CONDITIONS OF ANY KIND, either express or implied.
See the License for the specific language governing permissions and
limitations under the License.
-->
<!doctype html>
<html lang="en">
<head>
...
dashboard 给出了一个访问地址,可以看出这个地址和端口只是k8s的虚拟地址,只能本机访问。这个是因为 minikube 为自带的 dashboard 创建了默认的service ,并采用了 ClusterIP 的暴露策略,及只对集群内部提供了一个访问地址,集群外并不能直接访问,需要设置集群的代理地址,所以我们可以通过 kubectl proxy 添加集群对外暴露接口1
2
3[zach@VM-64-15-centos ~]$ kubectl proxy --port=8088 --address='0.0.0.0' --disable-filter=true
W0925 18:26:52.231038 28549 proxy.go:167] Request filter disabled, your proxy is vulnerable to XSRF attacks, please be cautious
Starting to serve on [::]:8088
这边要注意一个细节,8088 端口因为对外暴露了,所以防火墙那一块肯定不能拦,最好直接关掉1
[root@VM-64-15-centos ~]# systemctl stop firewalld
对于云服务器来说,这还不够, 因为云服务器本身机器的防火墙就是关闭的,他是通过安全组来开放端口的,所以要在安全组那边将 8088 这个端口进行开放。
另一个细节就是这个指令还是得用这个用户 zach 来执行,不能用 root 角色,不然端口会失败, curl 的时候报这个错误:1
[::1]:8080: connect: connection refused
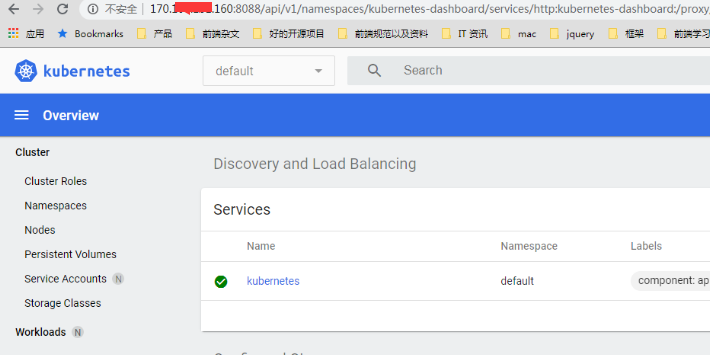
这样子外网 ip 就可以访问了:1
2
3
4
5
6
7[root@VM-64-15-centos ~]# curl http://170.xx.xx.160:8088/api/v1/namespaces/kubernetes-dashboard/services/http:kubernetes-dashboard:/proxy/
<!--
Copyright 2017 The Kubernetes Authors.
Licensed under the Apache License, Version 2.0 (the "License");
you may not use this file except in compliance with the License.
You may obtain a copy of the License at
这样子整个 minikube 就安装好了, 这边还有一个细节, 上述的 dashboard 指令 和 proxy 指令都是在前台运行的, 一旦 shell 窗口关闭了, 程序也就退出了。 所以我们要改成后台运行, 使用 nohup 将 dashboard 和 proxy 都变成后台运行1
2
3
4
5[zach@VM-64-15-centos root]$ nohup minikube dashboard
nohup: ignoring input and appending output to ‘/home/zach/nohup.out’
[zach@VM-64-15-centos root]$ nohup kubectl proxy --port=8088 --address='0.0.0.0' --disable-filter=true
nohup: ignoring input and appending output to ‘/home/zach/nohup.out’
这样子就算 shell 窗口关闭了, 程序还是在后台跑。 log 会输出到该用户根目录下的 nohup.out 文件1
2
3
4
5
6
7
8[zach@VM-64-15-centos ~]$ cat nohup.out
* Verifying dashboard health ...
* Launching proxy ...
* Verifying proxy health ...
* Opening http://127.0.0.1:39711/api/v1/namespaces/kubernetes-dashboard/services/http:kubernetes-dashboard:/proxy/ in your default browser...
- http://127.0.0.1:39711/api/v1/namespaces/kubernetes-dashboard/services/http:kubernetes-dashboard:/proxy/
W1010 15:57:40.510753 3499626 proxy.go:167] Request filter disabled, your proxy is vulnerable to XSRF attacks, please be cautious
Starting to serve on [::]:8088
如果要关闭也很简单, 找到对应的进程, 然后强制删除即可1
kill -9 [进程id]
这样子 minikube 就安装好了,接下来就简单操作一下。
体验
1. 查看组件状态
首先装好之后,查看一下组件状态1
2
3
4
5
6[zach@VM-64-15-centos root]$ kubectl get cs
Warning: v1 ComponentStatus is deprecated in v1.19+
NAME STATUS MESSAGE ERROR
controller-manager Unhealthy Get "http://127.0.0.1:10252/healthz": dial tcp 127.0.0.1:10252: connect: connection refused
scheduler Unhealthy Get "http://127.0.0.1:10251/healthz": dial tcp 127.0.0.1:10251: connect: connection refused
etcd-0 Healthy {"health":"true"}
发现 control 和 scheduler 都不健康, 后面查了一下 kubectl get cs showing unhealthy statuses for controller-manager and scheduler on v1.18.6 clean install, 发现在 v1.19 的版本,这个 api 已经不用了,所以也不准了。事实上是只要 etcd 是 healthy 就可以了。 它有包含另外两个的安全检查。
2. 查看集群
1 | [zach@VM-64-15-centos root]$ kubectl get node |
可以看到只有 minikube 一个点。 因为本来就是单点。
3. 部署一个 hello world 看看
1 | [zach@VM-64-15-centos root]$ kubectl create deployment hello-node-5 --image=k8s.gcr.io/echoserver:1.4 |
这样子就创建好了,接下来将服务暴露到宿主机 (设置type 为 NodePort)1
2[zach@VM-64-15-centos root]$ kubectl expose deployment hello-node-5 --type=NodePort --port=8080
service/hello-node-5 exposed
这边有一个细节要注意,这个端口不能随便设置的,要设置成 8080 (kubectl 的端口),不然就会导致服务起的时候,会连不上。
接下来查看服务:1
2
3
4[zach@VM-64-15-centos root]$ kubectl get services
NAME TYPE CLUSTER-IP EXTERNAL-IP PORT(S) AGE
hello-node-5 NodePort 10.101.214.191 <none> 8080:32225/TCP 10s
kubernetes ClusterIP 10.96.0.1 <none> 443/TCP 17h
将服务启动起来:1
2
3
4
5
6
7
8[zach@VM-64-15-centos root]$ minikube service hello-node-5
|-----------|--------------|-------------|-------------------------|
| NAMESPACE | NAME | TARGET PORT | URL |
|-----------|--------------|-------------|-------------------------|
| default | hello-node-5 | 8080 | http://172.17.0.3:32225 |
|-----------|--------------|-------------|-------------------------|
* Opening service default/hello-node-5 in default browser...
- http://172.17.0.3:32225
这时候集群内访问一下:1
2
3
4
5
6
7
8
9
10
11
12
13
14
15
16
17
18[zach@VM-64-15-centos root]$ curl http://172.17.0.3:32225
CLIENT VALUES:
client_address=172.18.0.1
command=GET
real path=/
query=nil
request_version=1.1
request_uri=http://172.17.0.3:8080/
SERVER VALUES:
server_version=nginx: 1.10.0 - lua: 10001
HEADERS RECEIVED:
accept=*/*
host=172.17.0.3:32225
user-agent=curl/7.29.0
BODY:
-no body in request-
是正常的。接下来将其端口映射,暴露到外网,使其可以在宿主机上访问1
2
3
4[zach@VM-64-15-centos root]$ kubectl port-forward service/hello-node-5 8005:8080
Forwarding from 127.0.0.1:8005 -> 8080
Forwarding from [::1]:8005 -> 8080
Handling connection for 8005
这样子就可以正常在宿主机上访问这个服务了:1
2
3
4
5
6
7
8
9
10
11
12
13
14
15
16
17
18[zach@VM-64-15-centos root]$ curl 127.0.0.1:8005
CLIENT VALUES:
client_address=127.0.0.1
command=GET
real path=/
query=nil
request_version=1.1
request_uri=http://127.0.0.1:8080/
SERVER VALUES:
server_version=nginx: 1.10.0 - lua: 10001
HEADERS RECEIVED:
accept=*/*
host=127.0.0.1:8005
user-agent=curl/7.29.0
BODY:
-no body in request-
4. 查看对应 pod 容器的日志
1 | [zach@VM-64-15-centos root]$ kubectl logs -f hello-node-5-b4bd86477-zvll5 |
5. 进入到 pods 容器中/复制文件到容器
跟 docker 操作类似,我们可以也可以进入到 pod 中的容器:1
2
3
4
5[zach@VM-64-15-centos root]$ kubectl exec -it hello-node-5-b4bd86477-zvll5 -- bash
root@hello-node-5-b4bd86477-zvll5:/# ls
README.md bin boot dev etc home lib lib64 media mnt opt proc root run sbin srv sys tmp usr var
root@hello-node-5-b4bd86477-zvll5:/# exit
exit
复制 pod 容器中的 档案 到宿主机1
2
3
4
5
6
7
8
9
10
11[zach@VM-64-15-centos root]$ kubectl cp hello-node-5-b4bd86477-zvll5:/etc/nginx/nginx.conf ~/abc.txt
tar: Removing leading `/' from member names
[zach@VM-64-15-centos root]$ cd
[zach@VM-64-15-centos ~]$ ll
total 4
-rw-rw-r-- 1 zach zach 2119 Oct 10 14:12 abc.txt
[zach@VM-64-15-centos ~]$ head abc.txt
events {
worker_connections 1024;
}
...
也可以将文件复制到容器中1
2
3
4
5
6
7
8
9[zach@VM-64-15-centos ~]$ echo 'hello world' > tmp.txt
[zach@VM-64-15-centos ~]$ cat tmp.txt
hello world
[zach@VM-64-15-centos ~]$ kubectl cp tmp.txt hello-node-5-b4bd86477-zvll5:/etc/tmp.txt
[zach@VM-64-15-centos ~]$ kubectl exec -it hello-node-5-b4bd86477-zvll5 -- bash
root@hello-node-5-b4bd86477-zvll5:/# cat /etc/tmp.txt
hello world
root@hello-node-5-b4bd86477-zvll5:/# exit
exit
遇到的几个坑
别看上面好像安装的顺风顺水,事实上不是这样子的,还是有遇到过一些问题的,只不过是解决完之后,为了让篇幅连贯,单独将遇到的问题合并起来讲。
1. cpu 一定要至少 2 核才行
之前在安装的时候,如果 cpu 只有一个的话, minikube start 启动的时候会报这个错误:1
2
3stderr:
docker: Error response from daemon: Range of CPUs is from 0.01 to 1.00, as there are only 1 CPUs available.
See 'docker run --help'.
2. 不能用 root 用户来执行
之前在用 docker 当 driver 的时候,有报了这个错1
2
3
4
5
6[root@VM_156_200_centos ~]# minikube start --driver=docker
* minikube v1.10.0 on Centos 7.6.1810
* Using the docker driver based on user configuration
* The "docker" driver should not be used with root privileges.
* If you are running minikube within a VM, consider using --driver=none:
* https://minikube.sigs.k8s.io/docs/reference/drivers/none/
后面查了一下: https://github.com/kubernetes/minikube/issues/7903
原来是不能用 root 角色来启动, 所以我后面又创建了一个 普通角色 来执行。也就是说,这三个指令:
1 | minikube start --driver=docker |
都要用这个用户来运行才行。
3. 启动 minikube 报代理错误
之前启动 minikube 的时候,有报了这个错1
2
3
4
5
6
7
[zach@VM-64-15-centos root]$ minikube start --driver=docker
...
* Updating the running docker "minikube" container ...
! This container is having trouble accessing https://k8s.gcr.io
* To pull new external images, you may need to configure a proxy: https://minikube.sigs.k8s.io/docs/reference/networking/proxy/
...
这个错误会导致,部署 pod 的时候,会拉取 image 失败,但是神奇的是,这台机器上网是可以的。 后面将 minikube 删掉重启,就可以了1
2
3
4
5
6
7
8
9
10
11
12
13
14
15
16[zach@VM-64-15-centos root]$ sudo systemctl restart docker.service
[zach@VM-64-15-centos root]$ minikube delete
* Deleting "minikube" in docker ...
* Deleting container "minikube" ...
* Removing /home/zach/.minikube/machines/minikube ...
* Removed all traces of the "minikube" cluster.
[zach@VM-64-15-centos root]$ minikube start --driver=docker
* minikube v1.13.1 on Centos 7.8.2003
* Using the docker driver based on user configuration
* Starting control plane node minikube in cluster minikube
* Pulling base image ...
* Creating docker container (CPUs=2, Memory=3900MB) ...
* Preparing Kubernetes v1.19.2 on Docker 19.03.8 ...
* Verifying Kubernetes components...
* Enabled addons: default-storageclass, storage-provisioner
* Done! kubectl is now configured to use "minikube" by default
参考资料: