前言
最近在做一个基于webrtc的项目,所以肯定需要turn和stun转发服务器,我用的是 coturn 这个服务来做。
安装
首先下载 centos7 对应的 tar 包,然后解压
地址:传送门1
2
3
4
5
6
7
8
9
10
11
12
13
14[root@VM_156_200_centos ~]# wget http://turnserver.open-sys.org/downloads/v4.5.0.7/turnserver-4.5.0.7-CentOS7.4-x86_64.tar.gz
--2018-04-19 23:53:42-- http://turnserver.open-sys.org/downloads/v4.5.0.7/turnserver-4.5.0.7-CentOS7.4-x86_64.tar.gz
正在解析主机 turnserver.open-sys.org (turnserver.open-sys.org)... 78.47.74.102
正在连接 turnserver.open-sys.org (turnserver.open-sys.org)|78.47.74.102|:80... 已连接。
已发出 HTTP 请求,正在等待回应... 200 OK
长度:370013 (361K) [application/x-gzip]
正在保存至: “turnserver-4.5.0.7-CentOS7.4-x86_64.tar.gz”
100%[====================================================================================>] 370,013 17.3KB/s 用时 18s
2018-04-19 23:54:02 (20.2 KB/s) - 已保存 “turnserver-4.5.0.7-CentOS7.4-x86_64.tar.gz” [370013/370013])
[root@VM_156_200_centos ~]# ls
anaconda-ks.cfg docker-compose-file docker-node-hello go mynginx turnserver-4.5.0.7-CentOS7.4-x86_64.tar.gz
解压tar 包
1 | [root@VM_156_200_centos ~]# tar xvfz turnserver-4.5.0.7-CentOS7.4-x86_64.tar.gz |
进入到 turnserver-4.5.0.7 这个目录, 执行 install.sh, 直接进行安装
1 | [root@VM_156_200_centos ~]# cd turnserver-4.5.0.7/ |
这样就成功了
修改配置文件
这样子turnserver 就安装成功了,接下来就是修改配置文件 /etc/turnserver/turnserver.conf
不过修改之前,要先用openssl生成证书1
openssl req -x509 -newkey rsa:2048 -keyout /etc/turn_server_pkey.pem -out /etc/turn_server_cert.pem -days 99999 -nodes
以下是修改的内容:1
2
3
4
5
6
7
8
9
10
11
12
13
14
15
16
17
18
19
20
21
22
23
24
25
26
27
28
29
30
31
32
33
34
35
36
37
38
39
40
41
42
43
44# 设置转发的ip(局域网ip),如果不设置,他会自己选择默认的
relay-ip=172.16.184.108
# 转发的外网ip(本机外网ip),用于NAT 地址映射
external-ip=47.96.xx.xx
# 转发的线程数,其实默认不设置最好
relay-threads=5
# WebRTC 的消息里会用到
fingerprint
# WebRTC 认证需要
lt-cred-mech
# REST API 认证需要
use-auth-secret
# REST API 加密所需的 KEY
# 这里我们使用“静态”的 KEY,Google 自己也用的这个
static-auth-secret=1234567890
# 统计状态信息的redis db
redis-statsdb="ip=59.57.xx.xx dbname=13 port=6379 connect_timeout=30"
# 用户登录域
realm=pano
# 证书
cert=/etc/turn_server_cert.pem
# 证书key
pkey=/etc/turn_server_pkey.pem
# 不输出log
#no-stdout-log
# 输出的log,将log输出到前台,然后会用supervisor来捕获
log-file=stdout
#syslog
# 存放进程的地方
pidfile="/var/run/turnserver.pid"
启动service
1 | [root@VM_156_200_centos turnserver]# service turnserver start |
当然因为我们用supervisor来捕获输出的log,所以其实后面就改用supervisor来启动了,supervisor 的配置文件如下:1
2
3
4
5
6
7
8
9
10[kbz@VM_16_13_centos ~]$ cat /etc/supervisor/conf.d/turnserver.conf
[program:turnserver]
command = /usr/bin/turnserver -c /etc/turnserver/turnserver.conf -v
user = root
autostart = true
autorestart = true
stdout_logfile = /var/log/supervisor/turnserver.info.log
stdout_logfile_maxbytes = 100MB
stdout_logfile_backups = 5
stderr_logfile = /var/log/supervisor/turnserver.error.log
这样子,输出的log就到了 /var/log/supervisor/turnserver.info.log 这个文件了
然后启动就变成这样1
sudo supervisorctl start turnserver
这样就启动起来了。
可以直接访问 3478 端口: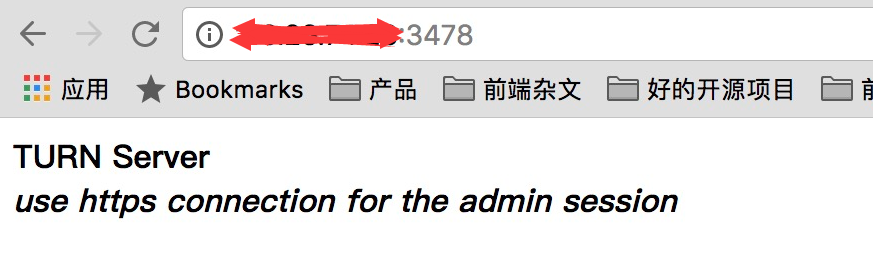
也可以看输出的日志了:1
2
3
4
5
6
7[kbz@VM_16_13_centos ~]$ tail -f /var/log/supervisor/turnserver.info.log
200428: session 003000000000002007: realm <pano> user <1531992181:28888f252480d1af366b693162e112ec_21_24_18153164>: incoming packet BINDING processed, success
200428: session 004000000000001287: realm <pano> user <1531993610:5075a3126b483f336d79705035d36e06_21_24_18154148>: incoming packet BINDING processed, success
200428: session 002000000000000749: closed (2nd stage), user <1531994358:e404da3f835436e43f6a1cceac91f485_21_25_tomwang304@gmail.com> realm <pano> origin <>, local 172.16.16.13:3478, remote 220.130.xxx.xxx:2463, reason: allocation timeout
200428: session 002000000000000749: delete: realm=<pano>, username=<1531994358:e404da3f835436e43f6a1cceac91f485_21_25_tomwang304@gmail.com>
200430: session 004000000000001245: realm <pano> user <1531986896:97f711c420972472e31e7599b0b78372_21_24_18154458>: incoming packet BINDING processed, success
200431: session 002000000000000745: realm <pano> user <1531993978:d5651643a0a1f66c720fc3502769dd96_21_24_18154654>: incoming packet BINDING processed, success